My Prusa MK3 in homemade enclosure
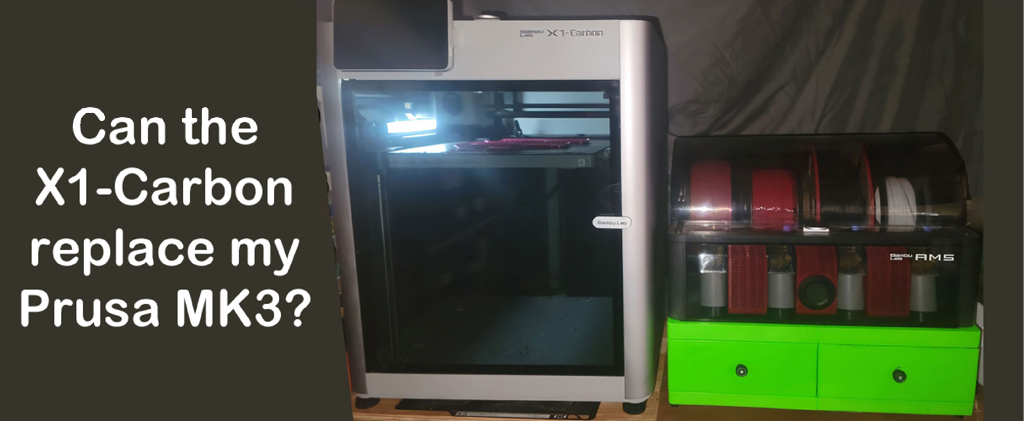
My Prusa MK3 has been a true gem, but after a solid three years of unwavering service, the plastic pieces sadly started to show signs of wear, cracking under the strain. I was at a crossroads: should I invest in a shiny new printer, or breathe new life into my trusty old MK3? My heart leaned towards the familiar comfort of my MK3, but the allure of multicolor prints was irresistible, especially with BambuLabs tempting me with their Black Friday sale. I won’t lie, I don’t regret my choice of an X1 Carbon with AMS, but oh, if only I had known what I was getting into! The prints are indeed stunning, but…
Let’s dive into my biggest gripe: the lack of Ethernet or USB. Files can only be transferred via WiFi, a limitation that didn’t seem troublesome at first. However, the frustration mounted when messages popped up, insisting that the printer and computer be on the same network. Seeking the utmost speed, my computer is hardwired to the Internet with Ethernet, forcing me to take a reluctant trip down memory lane to the 1970s, transferring sliced files with a microSD card.
And then there’s the issue with BambuLabs’ insistence on cloud-based everything. I’m not guarding any top-secret designs, but the thought of someone, be it Chinese or American, snooping over my prints doesn’t sit right with me. And before BambuLabs starts boasting about their cloud’s security, let’s remember the hard lessons learned by major companies whose servers were thought invulnerable until they weren’t.
Prusa’s introduction of removable magnetic beds with the MK3 was nothing short of revolutionary. The prospect of using BambuLabs’ magnetic plate filled me with excitement, but the reality was a test of patience. Unlike the slightly thicker and more stable Prusa plate, guided smoothly into place by two pins, the BambuLabs plate is a flimsy affair, bending frustratingly as it succumbs to the pull of the magnets, making precise positioning a near-Herculean task. Thankfully, the Bambu website offered a ray of hope with JDJDJD’s Shifty modification. Once I printed and installed it, bed alignment became a breeze.
Their default PETG filament temperature setting was a puzzling 10 degrees too high. Lowering the temperature was a simple fix, but saving it as a custom setting turned into an unexpected odyssey of confusion. Custom filament settings are tied to an array of factors like plate type, nozzle diameter, and printer model, making the process initially bewildering. Once I got the hang of it, it was smooth sailing, but be warned: importing a model from a different printer or bed setup means your custom settings stay hidden until you align all the variables.
The AMS (filament selector) color selection process remains a bit of a mystery. It has reliably produced the colors I’ve desired, but instead of selecting by AMS position, you specify the color. It’s not a deal-breaker, but it does leave me with a nagging uncertainty every time I import a file, unsure if it will print as intended.
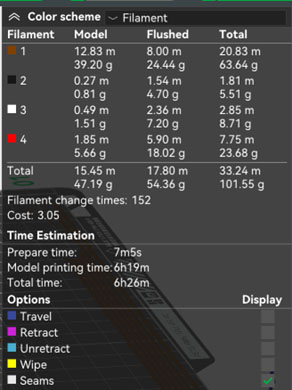
Note the flushed is larger than the model
The downside of the BambuLabs AMS, and indeed any printer that switches filaments for color selection, is the costly and time-consuming nature of multicolor printing. Each color change not only eats up time but also filaments, as it purges the previously melted plastic from the extruder.
The decision to add a few white spots to my gecko print transformed a manageable two-hour job into an exasperating six-hour ordeal, with more filament wasted than used. It’s been a journey to appreciate how design intricacies can significantly impact printing time, and the introduction of multicolor printing adds an entirely new layer of complexity. The Prusa XL sidesteps this issue with multiple extruder heads, but its $2400 price tag was a leap too far for my budget.
Reflecting on my journey, would I tread the same path again? Despite some initial hiccups with PETG temperatures, my prints have been nothing short of remarkable. The ability to infuse my prints with vibrant colors has been a game-changer, and the AMS’s airtight design, complete with its own desiccant, is a godsend, especially here in Texas with our 50% humidity days, it’s able to maintain a steady 10% inside.
I must admit, the print quality hasn’t seen a dramatic improvement. It’s definitely faster – my gecko print that took six hours on the Prusa now zips through in just two hours on the BambuLabs printer, provided I resist the temptation of adding colors.
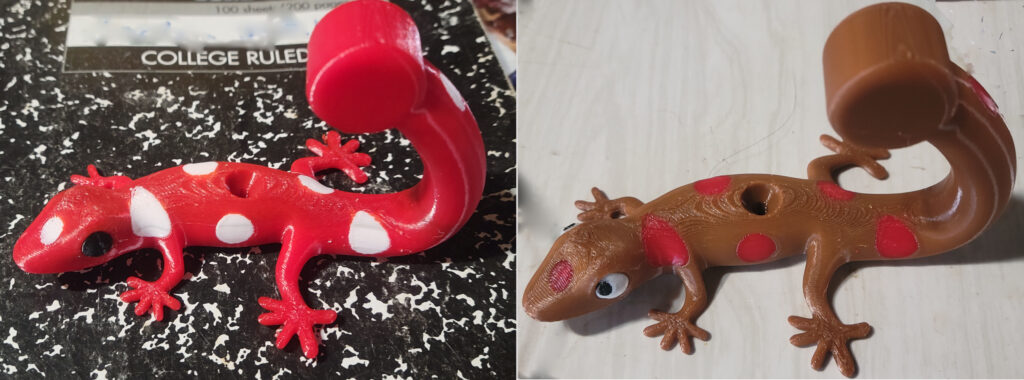
Gecko Hook by Colgador, spots added with BambuLabs slicer
Showing my wife the real-time camera feed from my printer on my phone left her astonished, wondering how I ever manage to get any work done. The printer’s ability to detect spaghetti prints and give me the power to stop or continue right from my phone is nothing short of incredible.
If I have to point out one major downside, it’s simply the unfamiliarity. It’s not what I’m used to. As I pen these thoughts, BambuLabs has just rolled out a new slicer version that promises to simplify custom filament settings and boasts significant improvements in color management, even giving a nod to Prusa for some of these enhancements. It’s heartening to see them focus on adding features, not just fixing bugs.
The BambuLabs X1 Carbon? It would indeed make a spectacular Christmas gift.
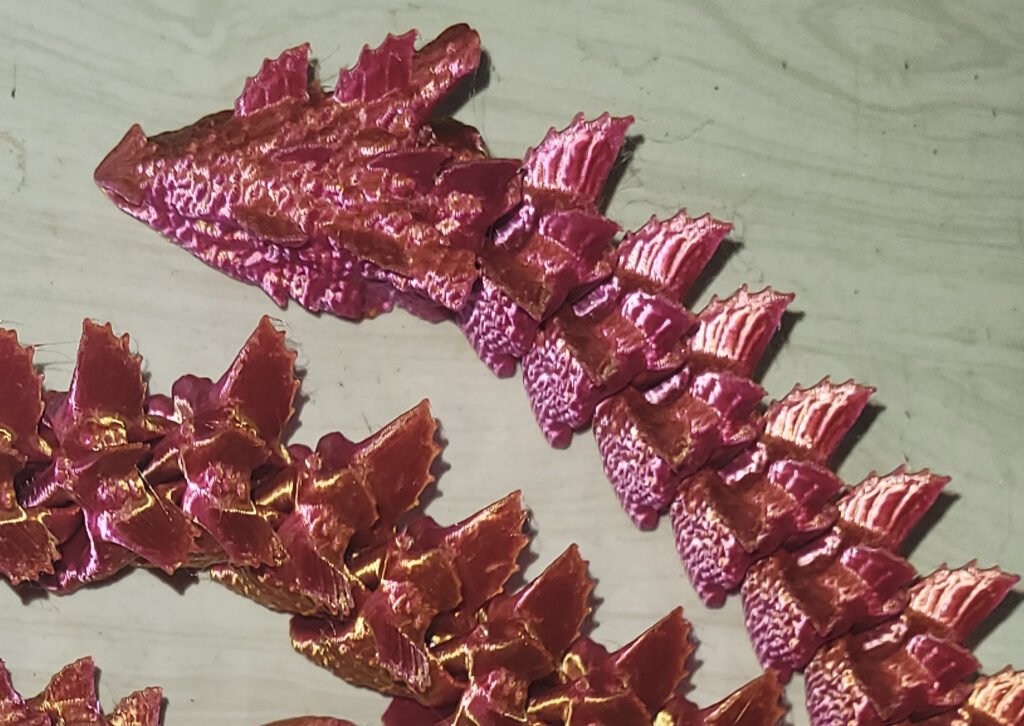
PLA Sea Dragon, note the detail and sharp edges on the fins
© 2023, Byron Seastrunk. All rights reserved.


Recent Comments