I bought the UP! Mini 3D printer from Amazon for $599. I found the sale price too good to pass up. Having had it for almost 48 hours, I don’t have buyer’s remorse but I might do more looking if I had it to do over. While this post is a review of the UP! Mini 3D printer. It’s also the second part of a three post set describing my first 3D printer along with the frustrations and successes. You might want to look at the first post to understand why I bought the printer.
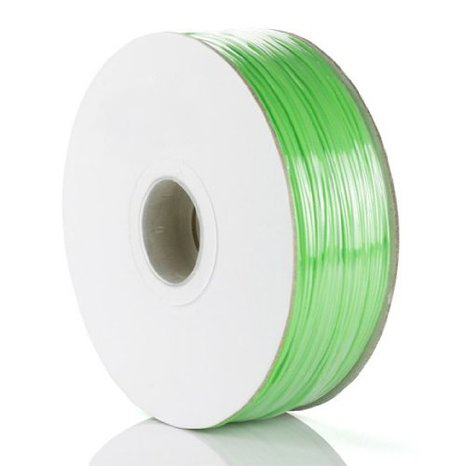 Starting with the basics, this printer uses Acrylonitrile butadiene styrene (ABS) plastic filament on a standard spool, it looks much like the line you use in your weed trimmer but tends to be slightly less flexible. The filament runs through a heated nozzle on a moving head and the result is much like using a hot glue gun to build up a mold. The difference is that this is much more controlled and rather than blobs, it builds an object using very thin layers, lots of layers.
The filament runs somewhere between $30 and $50 per kilogram or 2.2 lbs. What that means in terms of real world usage, I really have no idea. Based on how long each print takes, one kilogram will probably last me a week of solid use.
After reading the description on Wikipedia for ABS, I feel compiled to mention that I’ve noticed no obnoxious odors coming from the printer while it’s printing. You can definitely hear it while operating but it’s no worse than my inkjet printer. Of course, I don’t run my inkjet for 10 hours at a time either.

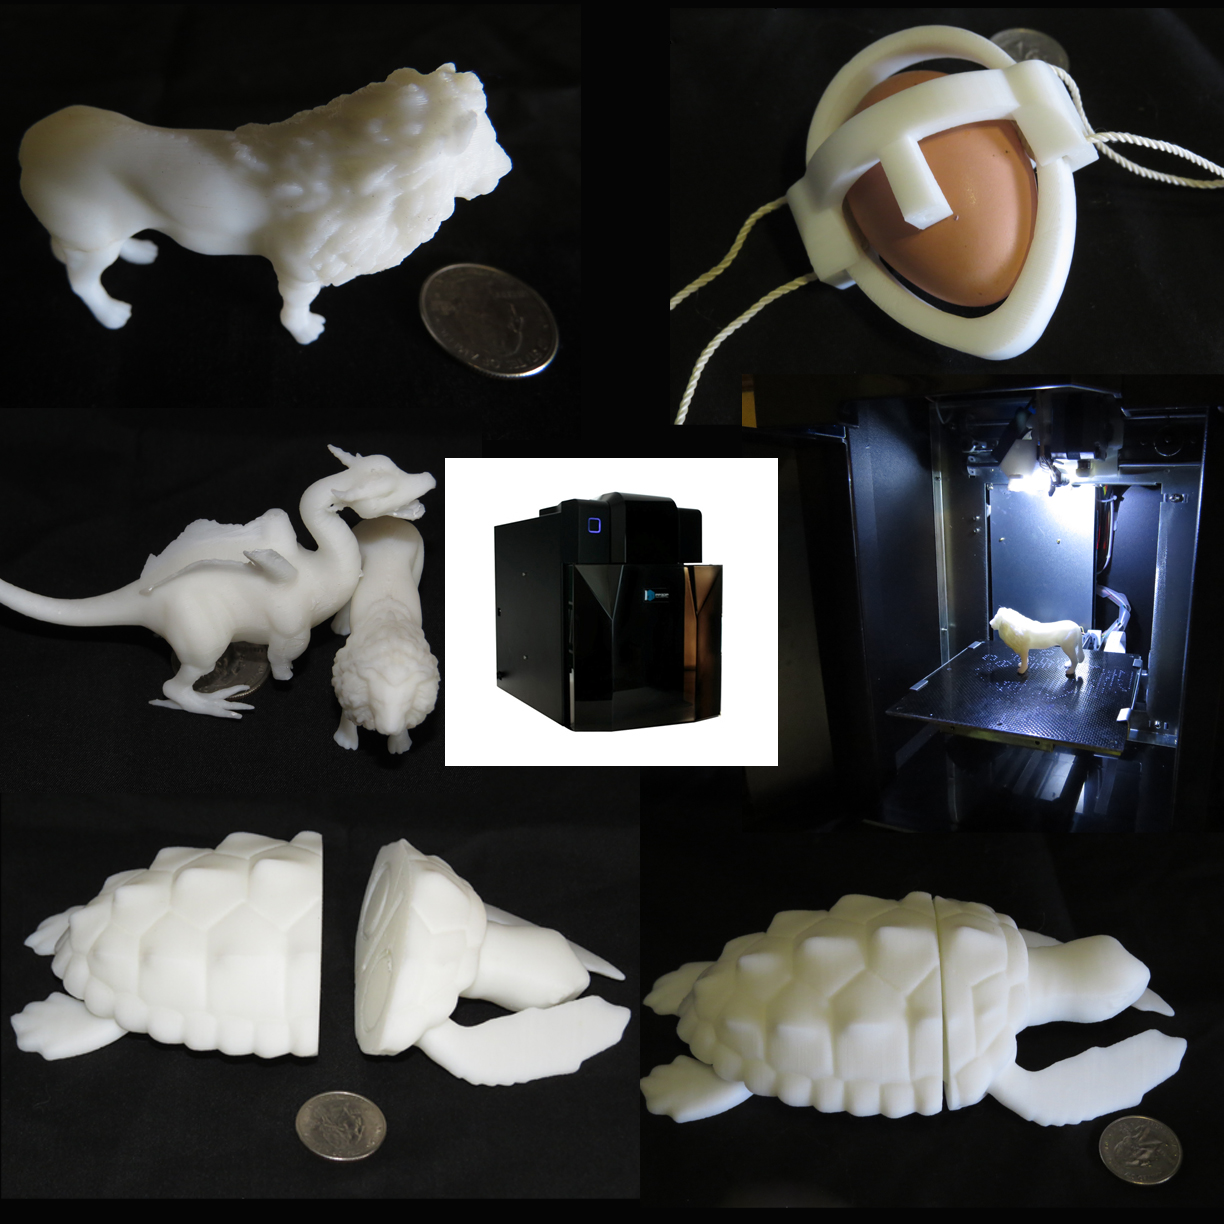
Lion in progress
The biggest drawback seems to be the light built into the print head. It’s easy to turn on and off but I tend to turn it on waste a lot of time watching the print taking place.
The Bad:
You absolutely need the instruction manual, it’s critical but it’s also so very frustrating. My credentials for saying this? I’m the guy that puts kits together that other people have given up on. I actually read instructions but these had me completely perplexed within minutes of starting. Expect to find clear concise instructions like, “Use the magnets to attach the head.“ Huh? What magnets? Where? I finally realized the head is mounted in a cradle using magnets embedded in the cradle to hold it in place. Great design but I spent ten minutes staring at the head and rotating it in different positions before I figured out how it fit.
It would have been nice if the instructions had covered the power switch in the back. I’m wondering why the pushbutton switch does nothing. I’m used to troubleshooting no power conditions so I have it open and screwdriver in hand when I notice terminals in the back suggesting a power switch.
We have power! We have communication with the printer and we have an error message. No mention of this in the manual. I finally tried Init in the software menu. This caused the table to move up and down, the head move back and forth and the error message went away, progress.
What happened next was entirely my fault but I was done with the manual, it had been worthless so far. As a result I skipped an important step “Platform calibrate”. Two hours after I told it to print, my computer was still sending data and the head hadn’t moved yet. Was something wrong? Was this as expected? Reluctantly I went back to the manual. Sure enough, Platform calibrate was listed as necessary. I’ll skip the frustration I had in trying interpret what they meant by “orderly to night points.”
Let me try it this way, manual very, very bad! If you consider the number of machines that will be returned or damaged because of a poor quality manual, the cost of a good tech writer is almost insignificant. The folks at pp3dp.com need a tech writer.
Compared to the manual, my other complaint is minor but unfortunately critical. The platform is small. When I bought this, 4.75 X 4.75 X 4.75 seemed very reasonable and it is, for most items. Unfortunately many of the models out there are designed for larger platforms. The software allows you to scale your project down to fit the platform but as I found out in my first print this isn’t always a good choice.
The Good:
There’s a professional look to the UP! Mini. With the exception of the filament spool, it’s fully enclosed in a very nice case. I have it sitting next to my computer and the two cases almost look coordinated.
It has a small footprint, about 10 inches wide, 14 inches deep and 14 inches high. Combined with the professional look of the case, makes it easy to imagine this on almost any desk. As I said earlier, there’s no noxious odors and the sound, while not insignificant, doesn’t force me to raise my voice for conversation.
It uses standard size 1.75 mm ABS plastic filament spools. I don’t have to worry about proprietary sizes, specialized plastics, or brand specific filament dispensers like we have in the inkjet printer world. It’s also supposed to use polylactide (PLA) filament but while I have a spool of PLA waiting, I haven’t tried it yet.
There’s nothing stingy about the accessories. The printer came with one full size spool of white ABS filament. It also came with three rafts (the platform your print is built on), an X-acto knife, a putty knife, tweezers, a pair of small cutters and gloves. So far the only thing I haven’t needed were the gloves.
Using the model descriptions as a guide, my printing speed seems as good as or slightly better than the majority of sites. My lion was printed in 90 minutes, my dragon took over nine hours and failed because I did not understand what I was doing.
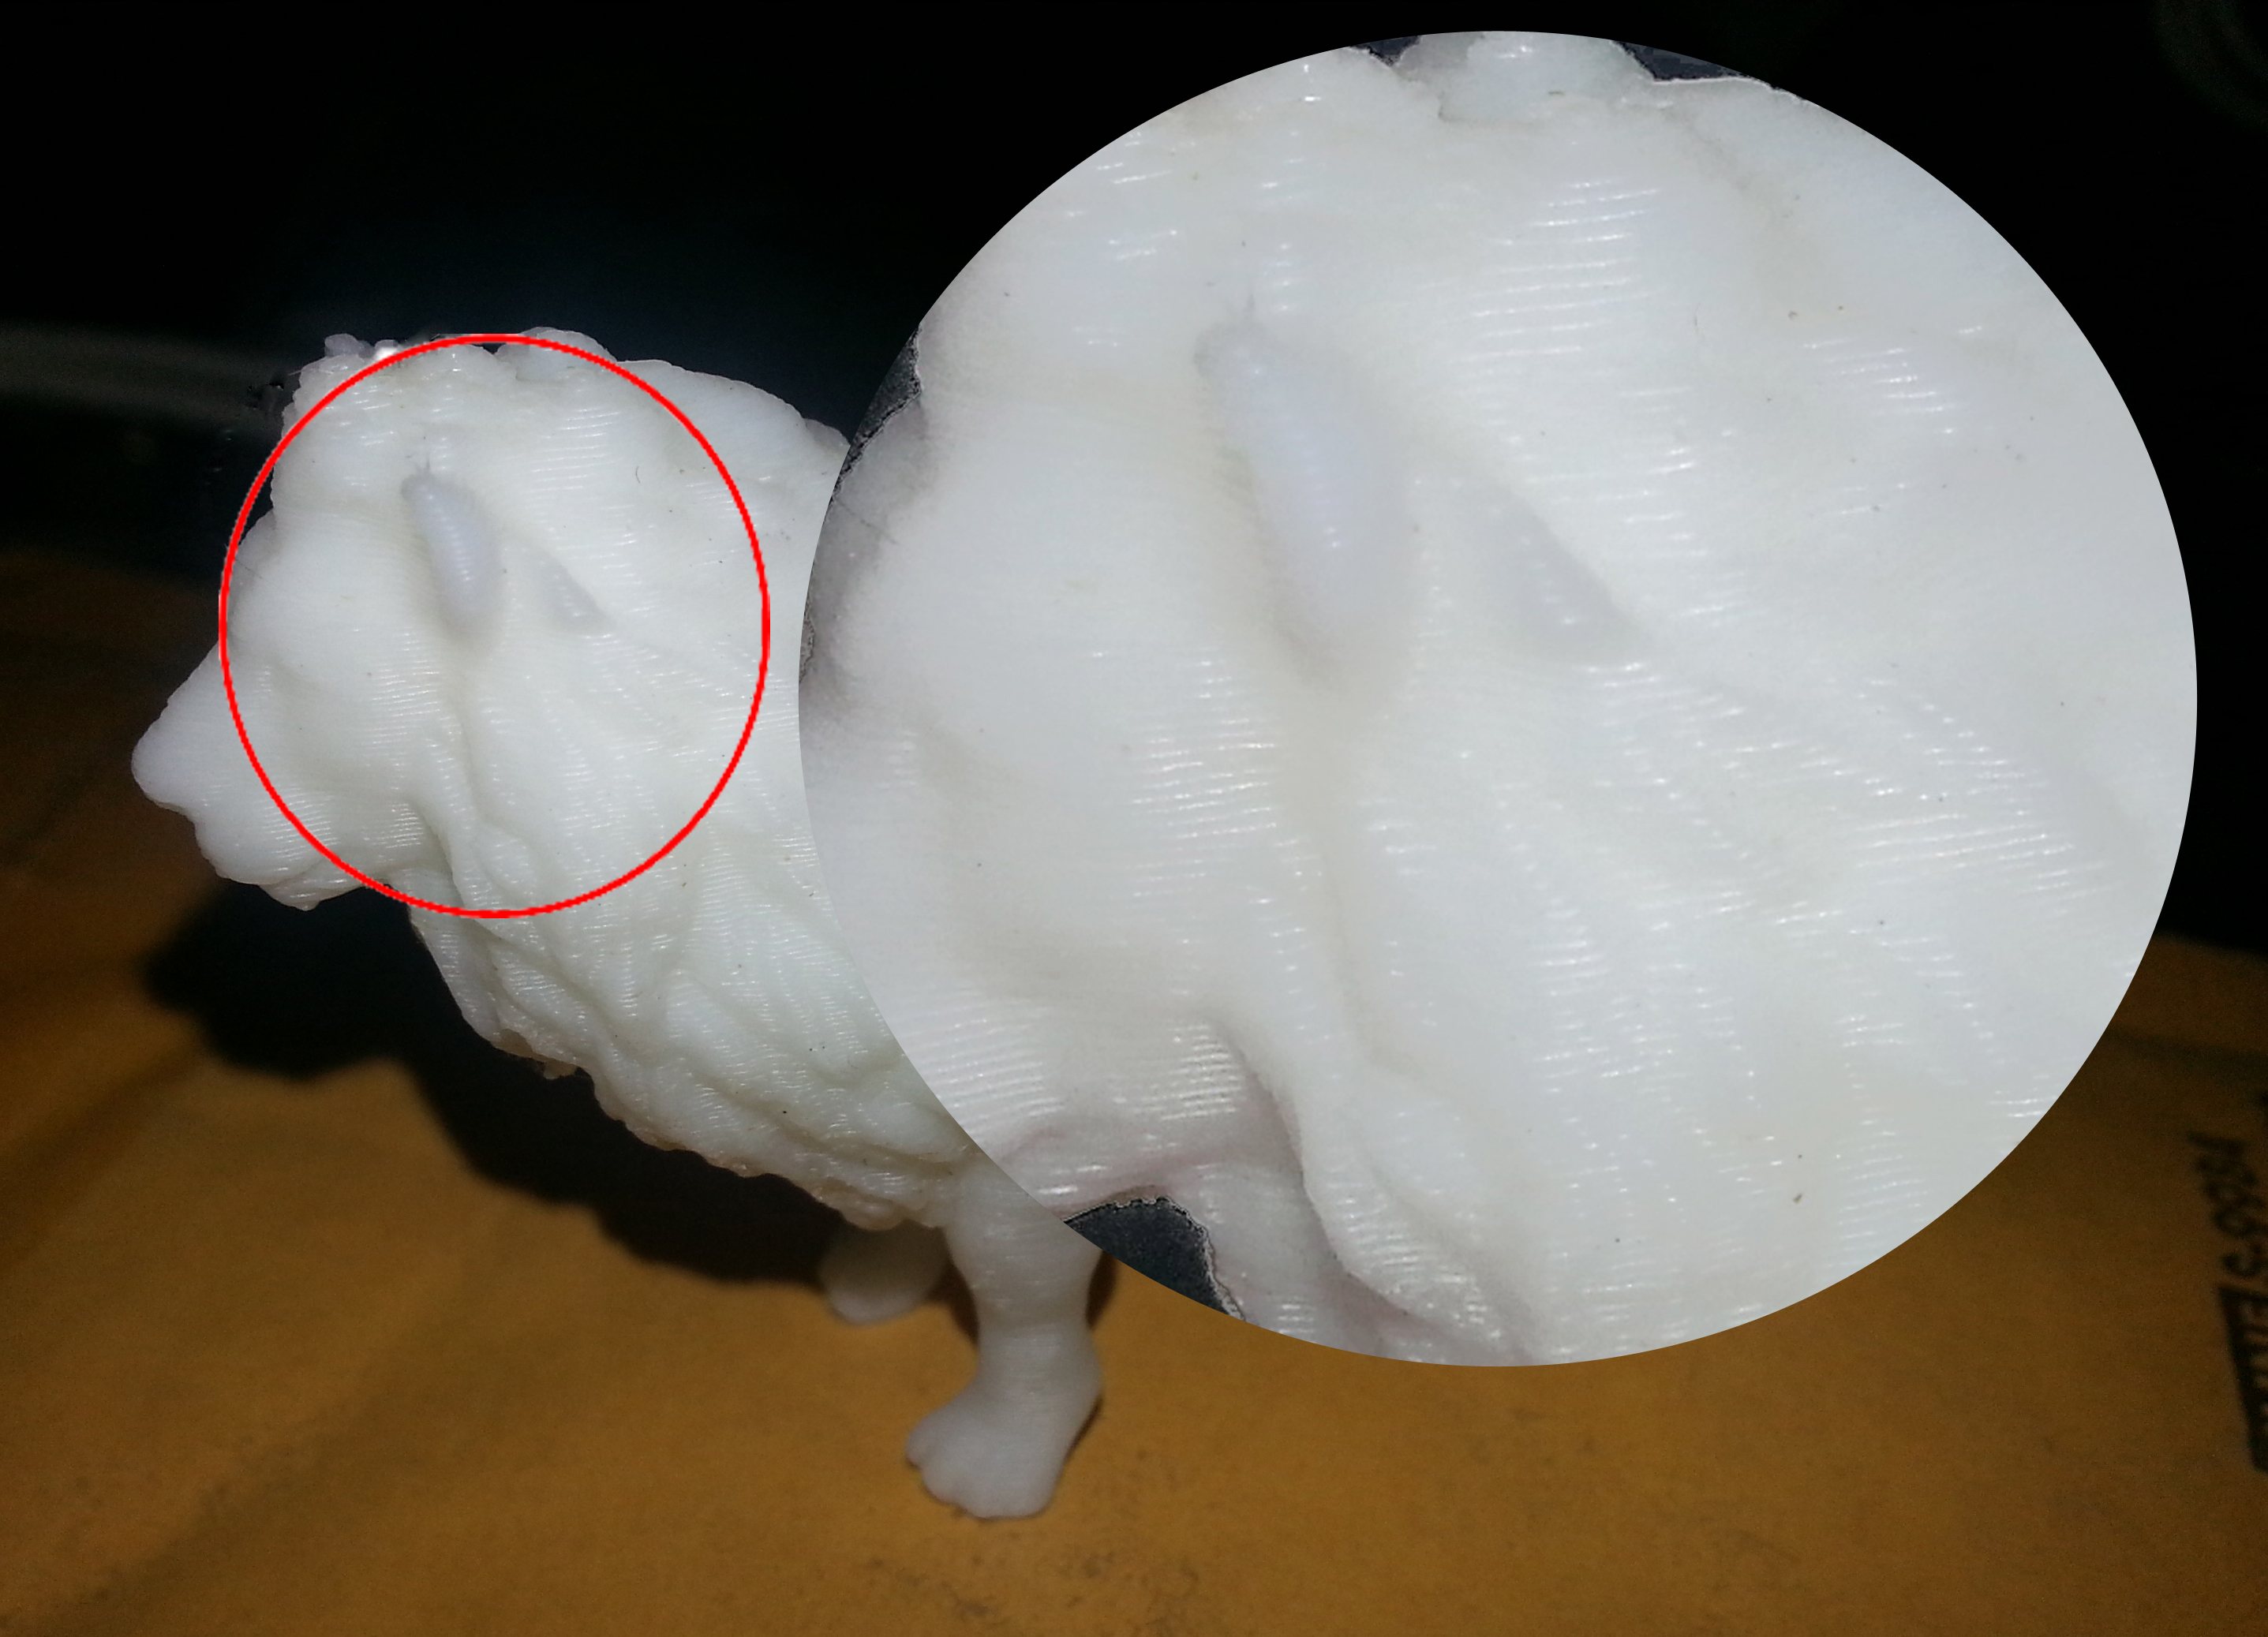
Lion close up showing printer layers
The level of detail is good. The software allows me to go down to 0.2 mm per layer. That’s 125 layers per inch, giving me good resolution in the models. I can make the layers thicker and gain significantly in speed but I’m happy right now. The finished surface is smooth enough that the mane on my lion shows the texture of his hair.
The software gives me lots of options I have no clue about (bad manual) but it does give me the basics to play with. It also adds breakaway supports where needed for printing. Nothing was mentioned about supports in the manual so when I printed the dragon model with supports incorporated for the wings, I ended up with a forest of supports. I’ll cover that in my next post.
A Minor Caution:
The provided software allows you to print an SLA model. You have options to position the model on the raft or change the size. You can not create your own models with this software. I downloaded all the models I’ve printed from www.thingiverse.com. It’s a great site and gives you a good idea of what’s out there for 3D printers.
Overall Impression:
This is my first 3D printer and I’m not disappointed. It’s unlikely to be my last but for small objects, prototypes and toys, it’s great. I don’t think they make fast 3D printers yet but this one has reasonable speed, taking somewhere between two to ten hours per print depending on the size and complexity.
As bad as the manual is, the price makes this a great printer to start with. I have no regrets.
Update 8/3/2014: See how I felt about my printer after owning it for a month, Up Mini Revisited
© 2014 – 2019, Byron Seastrunk. All rights reserved.


So u cannot import designs like u and I talked about
Not with the provided software but there’s lots of software out there that will enable me to create my own models. Fortunately most of what I’ve learned using Poser will help me here.
It never occurred to me I’d be interested in this but……I’m paying more attention now.