The 3D printer testing this week by Make magazine inspired me to do this follow-up post on my Up Mini 3D printer. I’ll answer the most obvious question first. Then again, maybe not, I still have no rational reason for why I bought the printer but I can enthusiastically say I have no regrets about buying one. I’m having more fun than Ronin when he discovered the beach.

Ronin’s first trip to the beach
Before you rush out to order one based on my recommendations, let’s talk about some of the things I’ve learned. 3D printing at home is still a hobbyist activity. You know the person I’m talking about, someone that doesn’t mind voiding warranties. Someone that doesn’t expect perfection the first or second time.

Basset ears turned out to be extremely difficult on my printer
My Up Mini 3D printer is great but I do produce a lot of scrap. Of course some of it be reduced as my techniques improve but much of it is simply the way 3D printing is. Let me start with some of the basics. I’m going to show a lot of my failures throughout this post but I’ve also had a lot of successes. Don’t get discouraged.
Dragon attempts. The one on the right went very badly.
First I had to learn that just like printer ink, not all plastic filament is the same. I purchased most of my filament on Amazon and read the reviews very carefully. That’s when I realized that not all printers have the same design. What works well on my printer might not work well on another and vice versa. For example, I’ve read that the filament nozzle on my printer runs hotter than most of the printers out there.
Different formulations of ABS have slightly different temperature characteristics. As the car below shows, this was causing difficulty removing the print from the platform. Since my printer does not have a temperature control, I have no choice but to use the filament that most closely matches my printer or modify the print head for thermal control. You can guess the direction I went, fortunately somebody sells a kit.
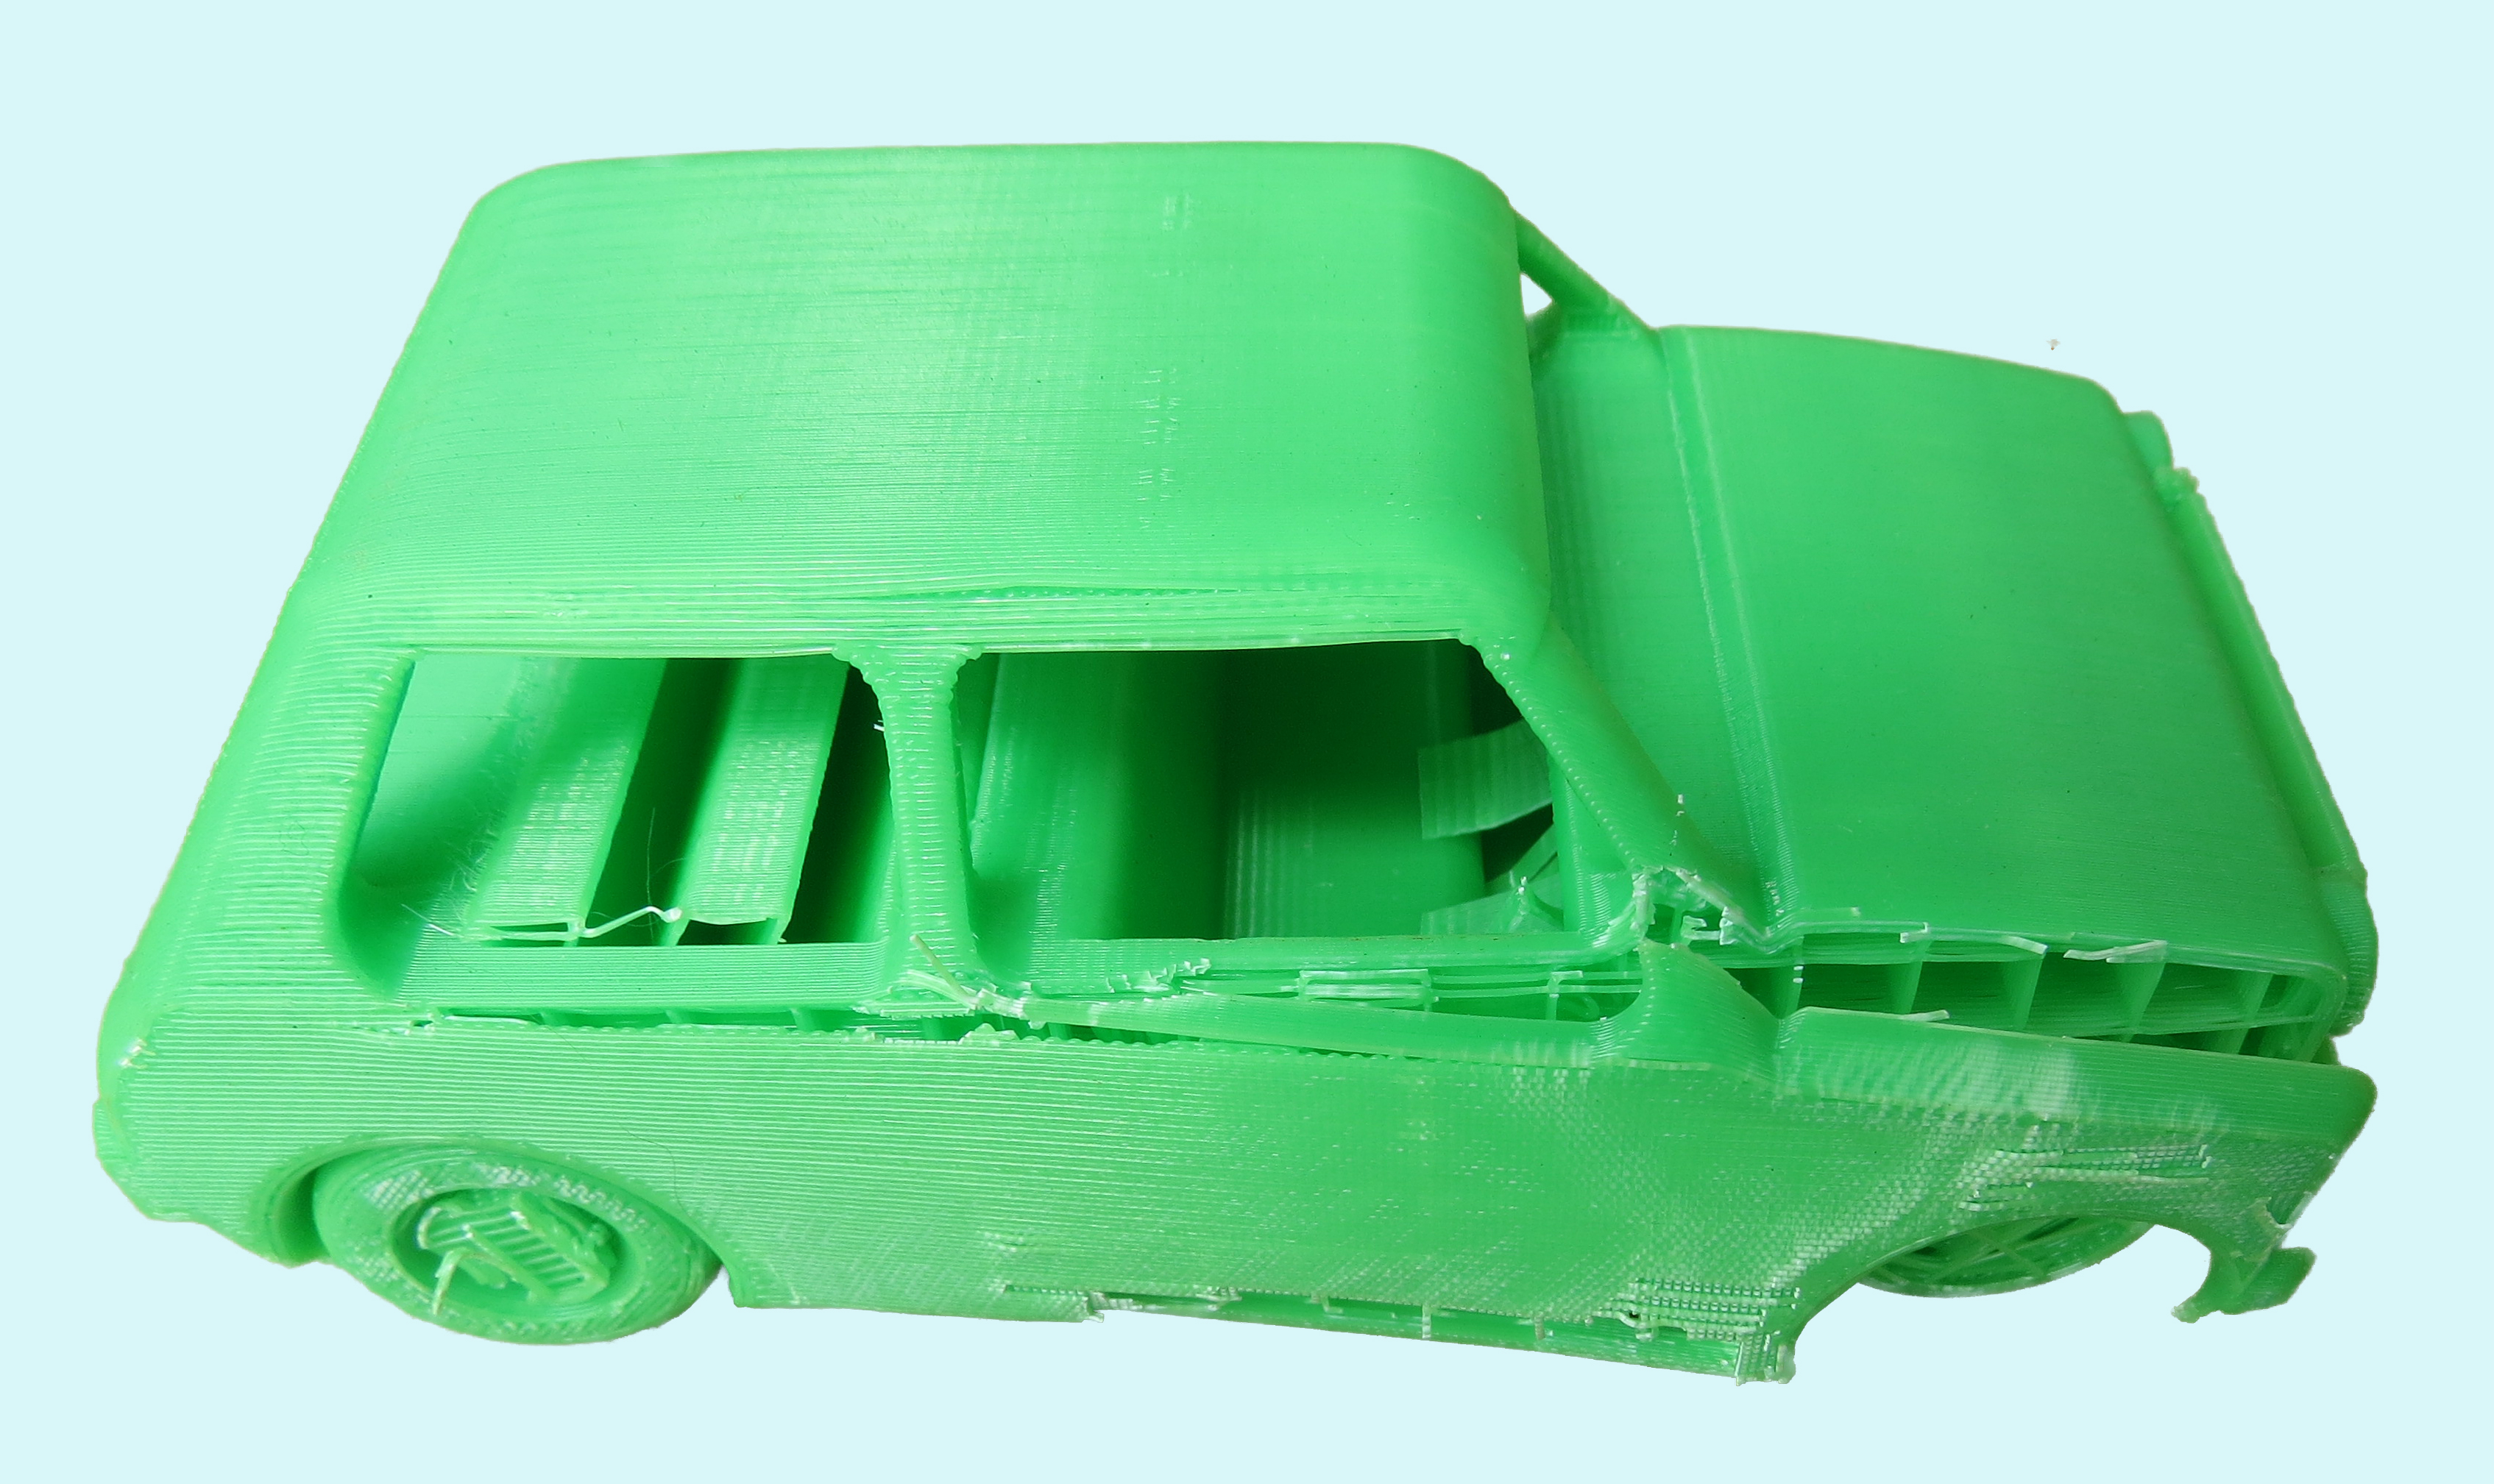
This car was damaged while trying to remove it from the platform
The company selling me the kit promised me that this would open up a large number of different plastics. That might be true if nozzle temperature were the only problem. My Up Mini 3D printer has a slight design flaw in the nozzle feed system. The filament going into the printer nozzle does not have sufficient cooling and if you’re using a low temperature filament like PLA you will have problems. The PLA I bought would deform inside the filament feed assembly and jam. After the third time, I resorted to Google and discovered that this is a known problem without many good solutions.
I see this as a challenge rather than a setback and I’m already planning modifications here but the tone of my first post would have been far different if I started out with the PLA.
While we’re discussing issues, I may as well bring up my second issue, warping. My UP Mini came with three reusable platforms made of a perforated material. I assume the holes are supposed to provide a good grip for the ABS and it works very well for printing small animals with four feet. Printing something with a large flat surface turns out to be very difficult. One hour into the print and I noticed that one or more of the corners has lifted off the platform and the nice flat box has a very rounded corner.
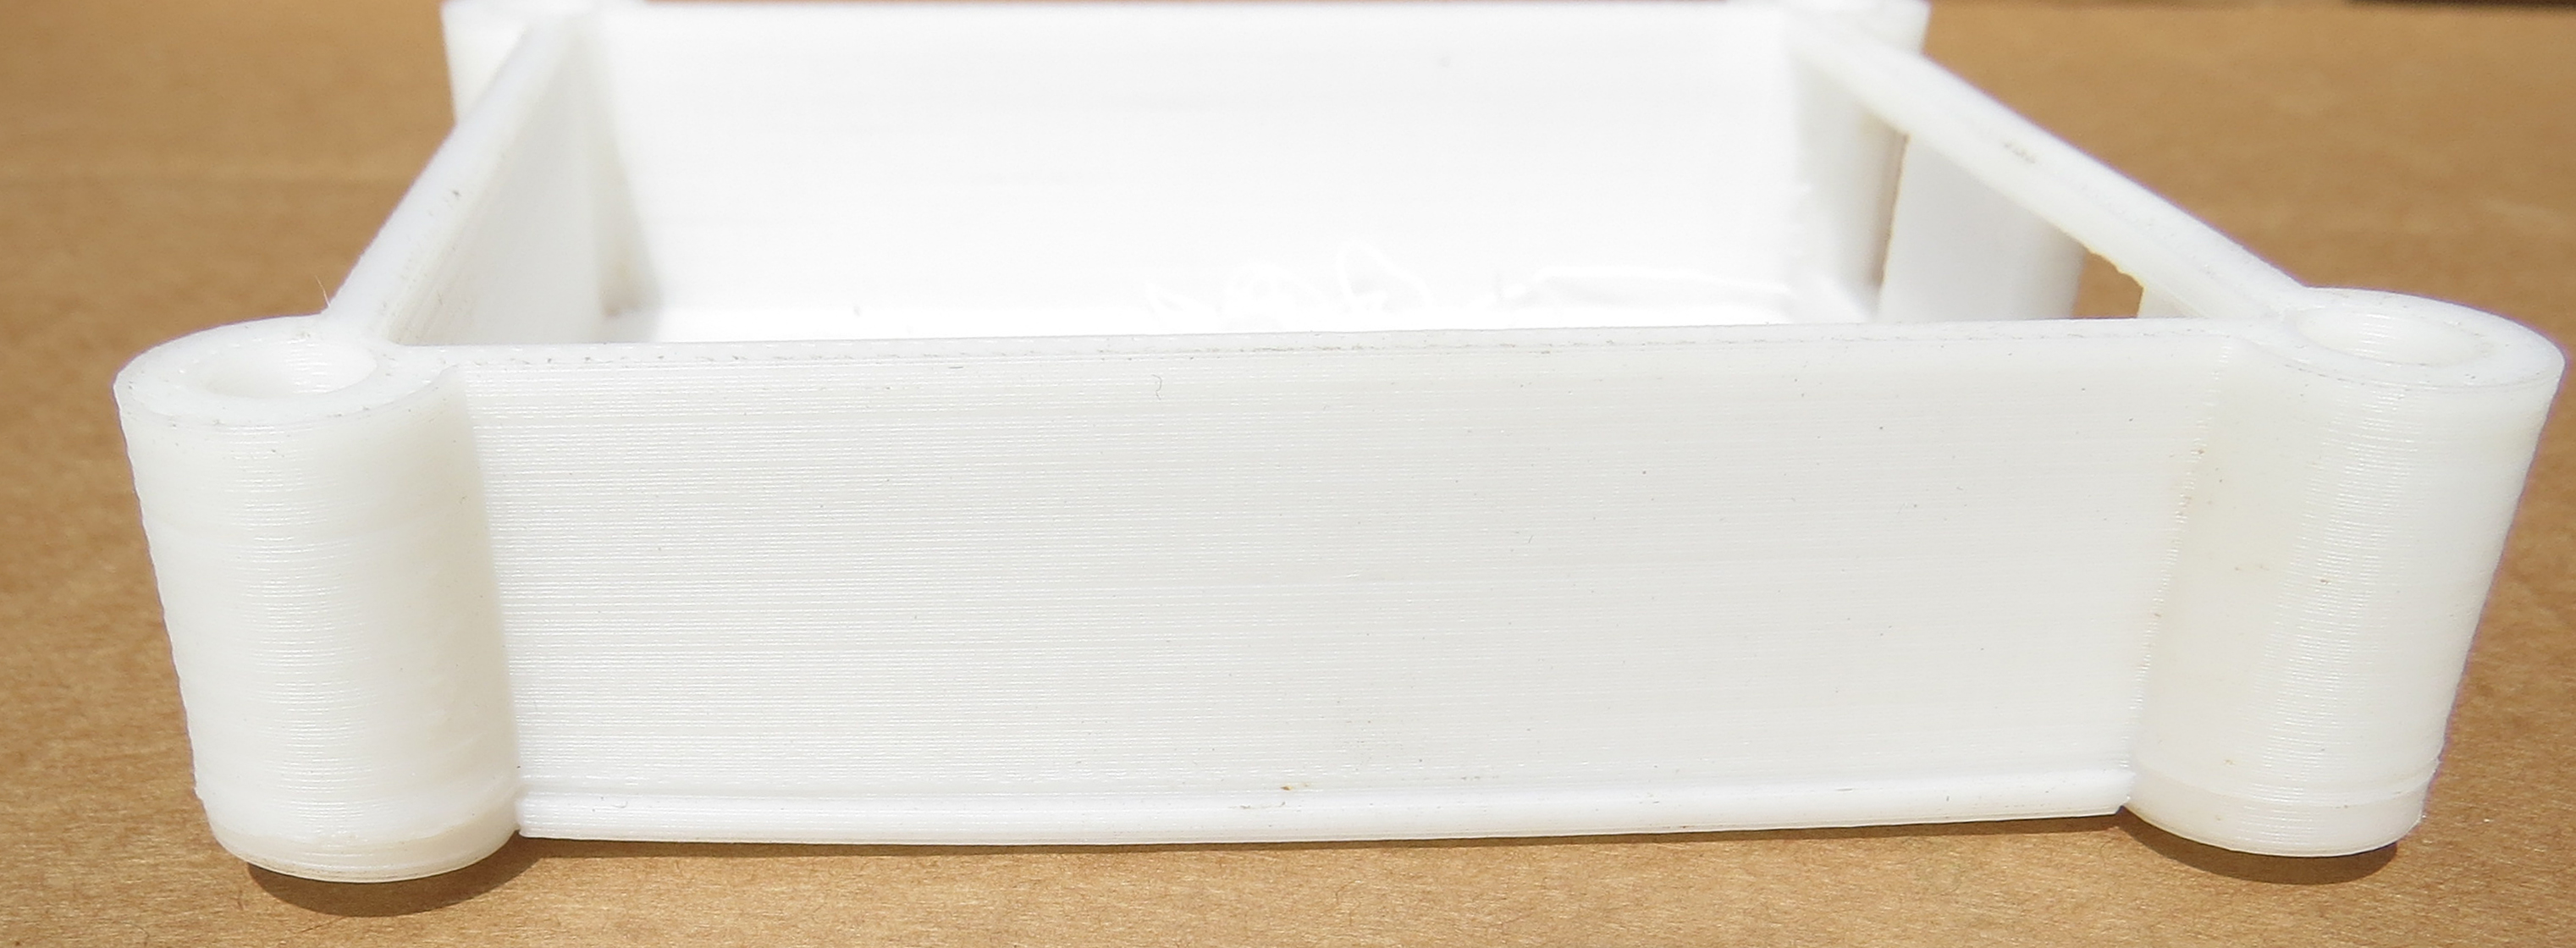
Arduino enclosure. Notice the way the corners are warped.
After I tried cleaning my platforms and abrading them with only marginally better results I went back to the Internet for answers. This is also a common problem but it’s exacerbated on the UP Mini because the platform has a lower temperature than most of the printers out there. This is easily modified but as one person put it, the platform parts become slightly squishy at 100C.
There are other options. Since this involves adhesion to the platform, using a different platform material or coating it with something often helps. I now have a borosilicate glass platform, a month’s supply of blue painter’s tape and three tubes of Elmer’s purple glue. I know the painter’s tape did not help. I had it lift off the platform and when it stayed I still had a corner lift off the tape. I don’t know if the others work or not because I found my solution by accident. Using a scrap piece of acrylic from Lowe’s hardware, I cut it to size and tried it. This gave me beautiful adhesion but the force was actually warping the acrylic.
The UP Mini came with several spare parts and tools but it also had some small binder clips. Using these on both sides of the acrylic, I was able to keep it flat during the print process. No more warped corners. It also cleans up very easily.
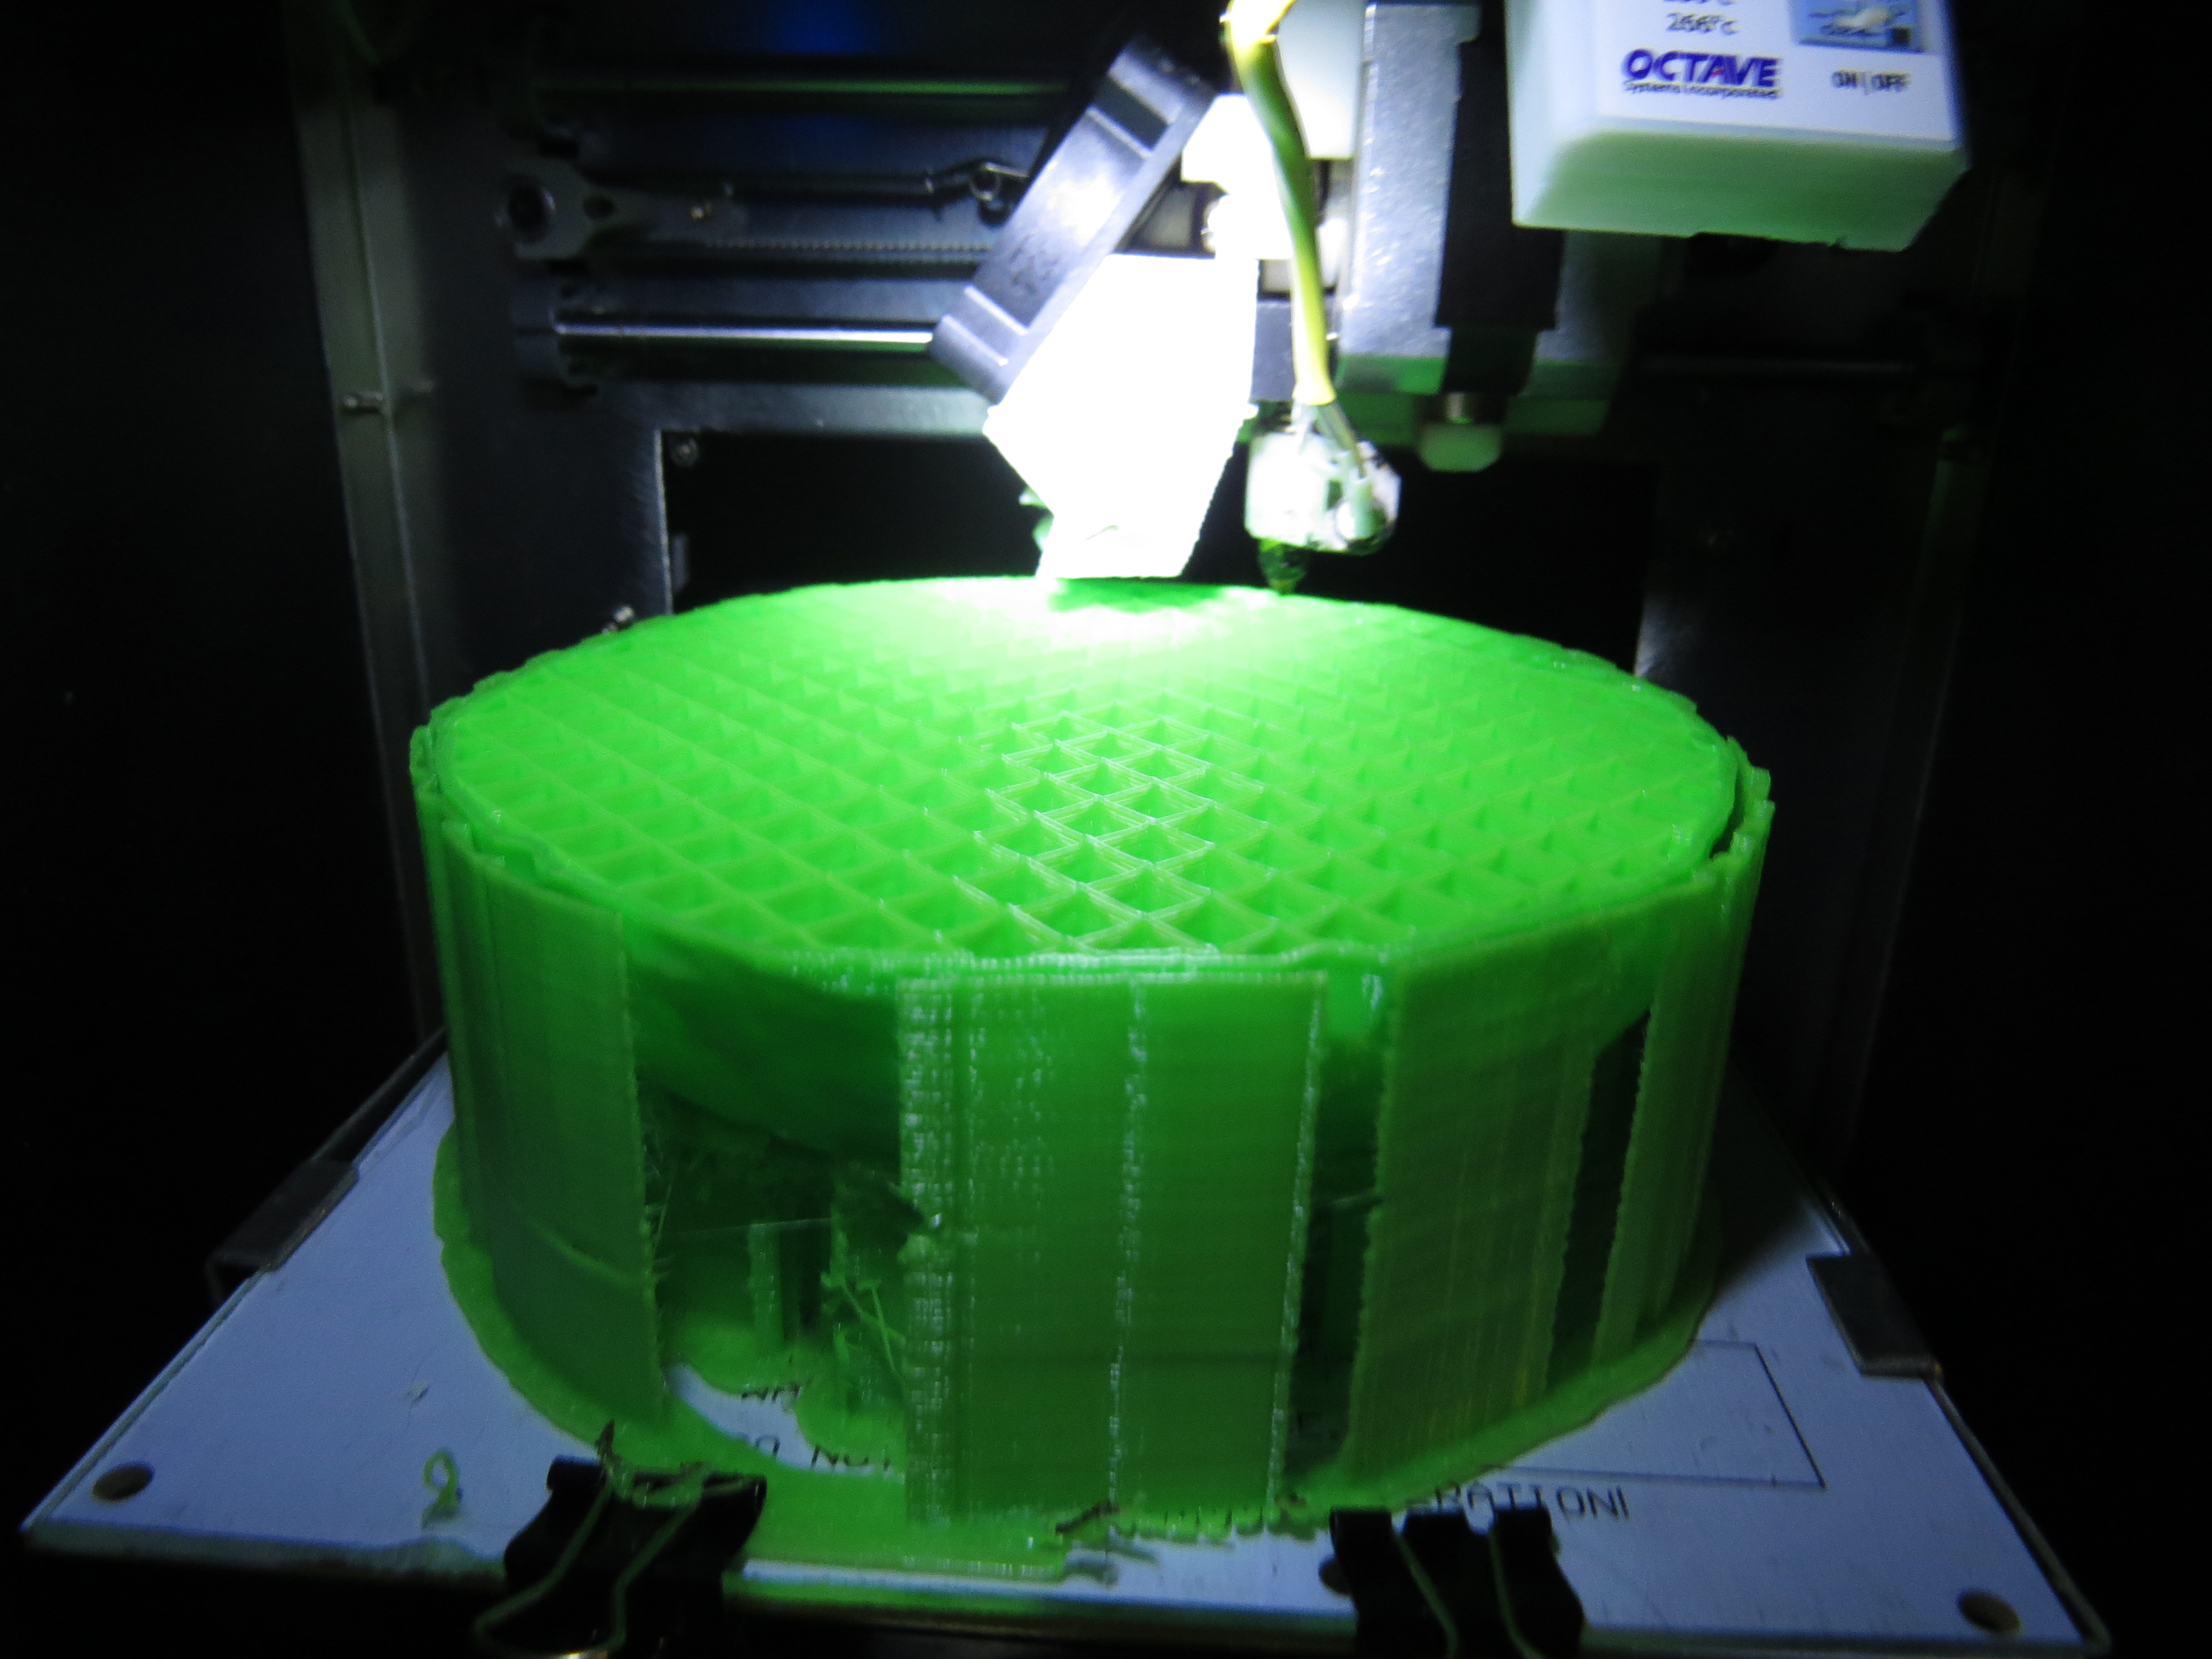
Vesta asteroid being printed. You can see the binder clips holding the platform in place.
A word of caution. Among all the other accessories, Up Mini also came with a pair of gloves. I thought they were for handling hot models as they came out of the printer but none of the models were uncomfortable to handle.
So I’m a slow learner. About the fourth time I had to take a break and hunt down the Band-Aids while trying to cut the model from the platform, I realized that wearing gloves during this operation would provide much needed protection. Thanks to the gloves I no longer have Les Nessman flashbacks.
Okay, I’ve managed variable temperature needs, avoided PLA, overcome warping, and eliminated minor cuts, you would think my prints came out perfect now, if only.
I have a very good printer but just because someone releases a model on Thingiverse.com it doesn’t mean I can print it. Actually, considering some of the models released, I’m not sure anyone could print them. Still, each 3D printer has it strengths and weaknesses. What works on one printer may not work on mine. I’m not to the point where I can do my own complex models but as I modify the models I do print, I’m learning more and more about the capabilities of Blender and SketchUp.

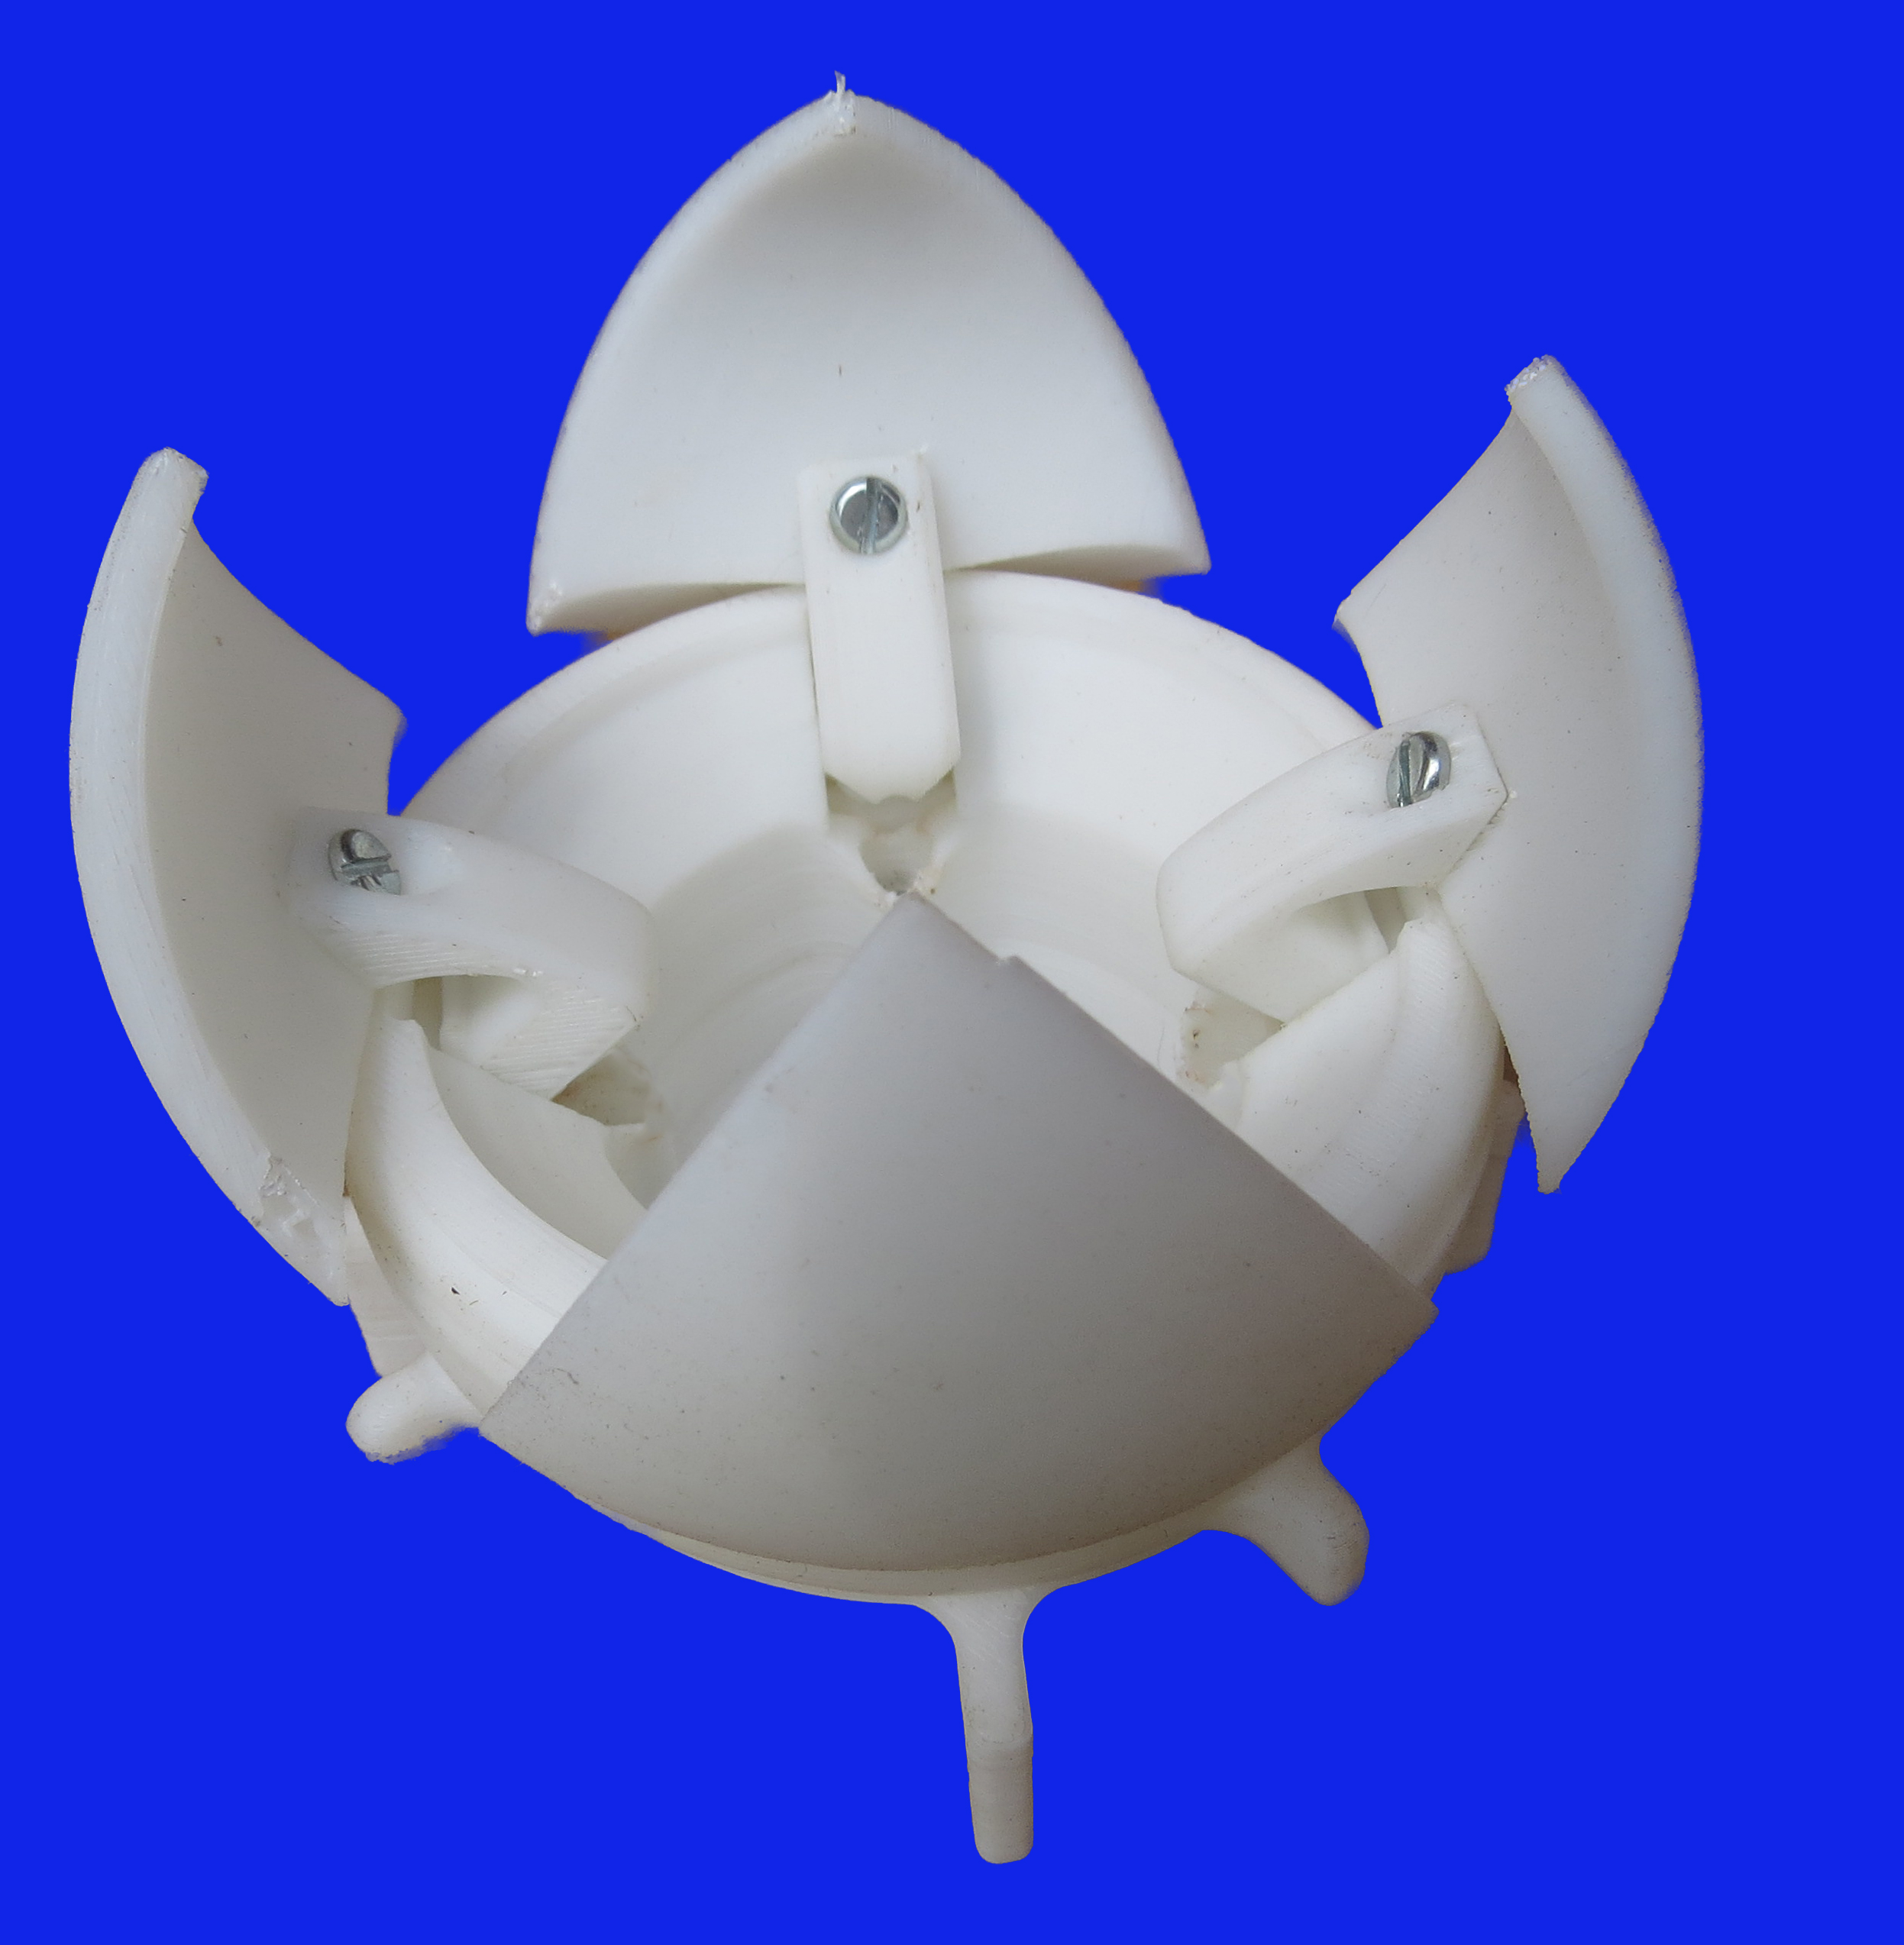
Penguin cookie cutters. The outer wall was too thin for my printer. The upper two came out well after I modified the model in Blender.
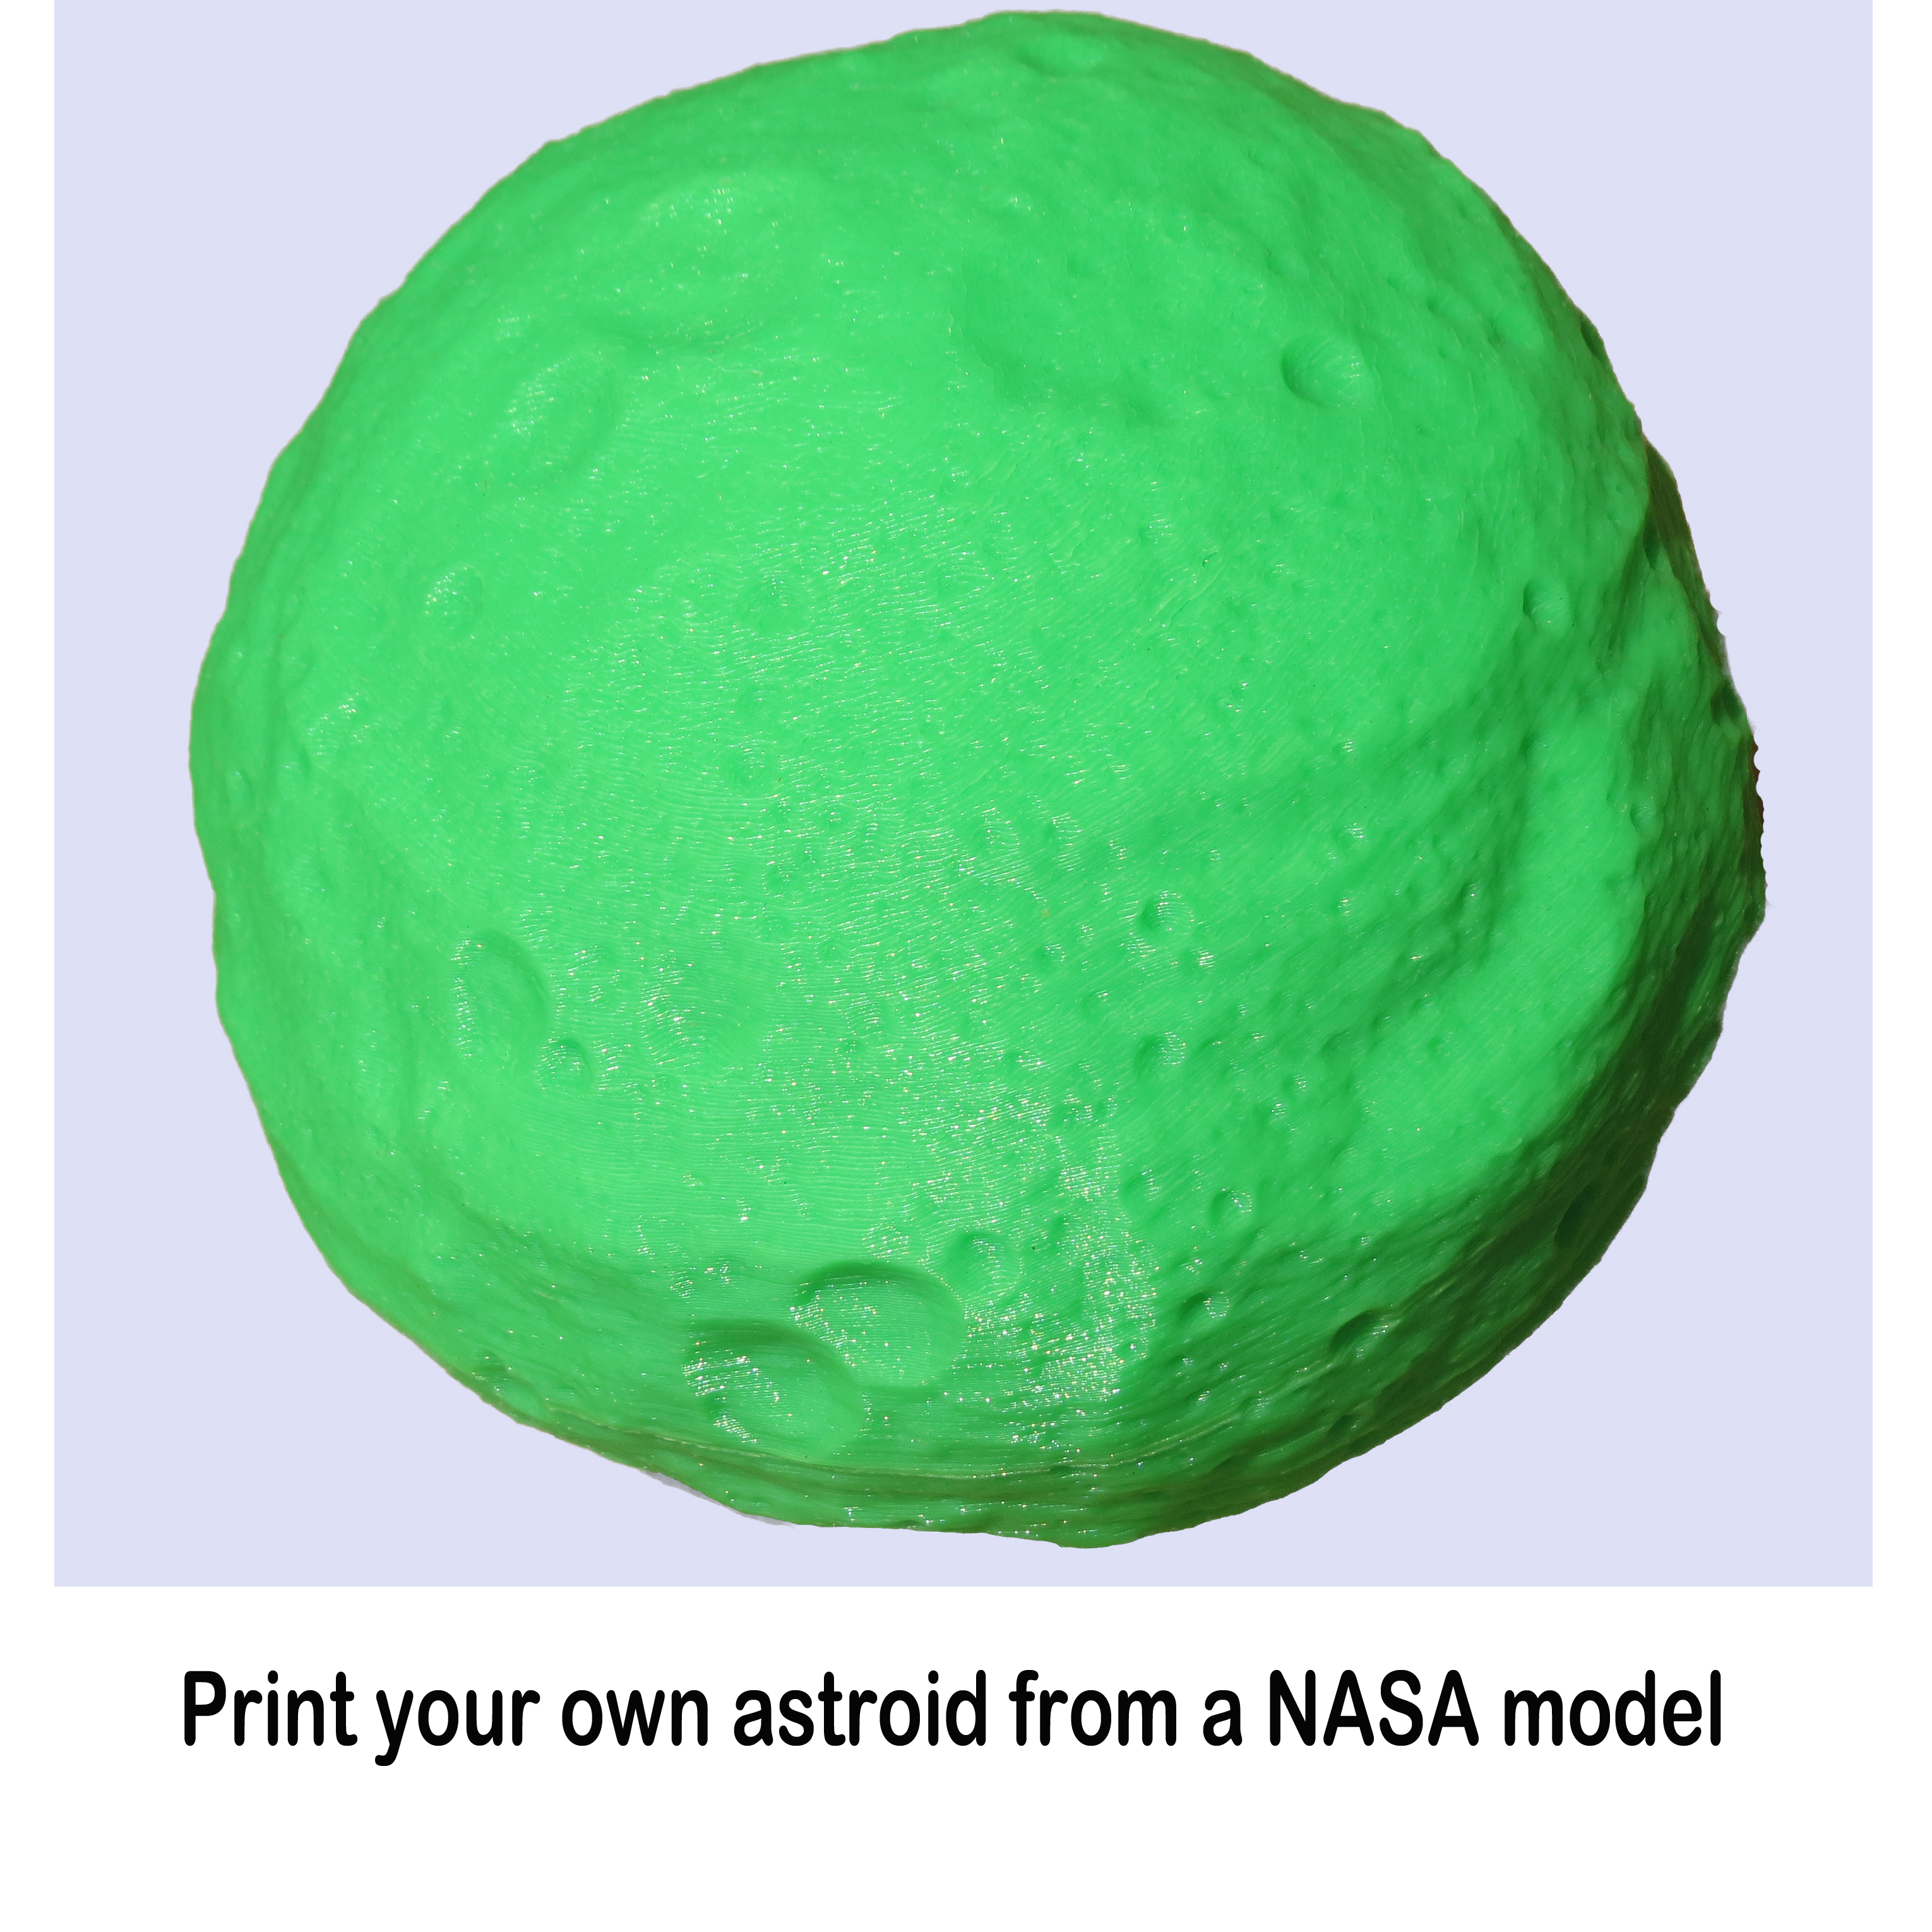
I don’t believe that 3D printing is ready for the consumer market but for the hobbyist not afraid of a few failures and making a few modifications, this is a great time to jump in. Did I mention NASA has started releasing some 3D models of asteroids and spacecraft?
A few of my successes!!

Dog with an attitude
Mechanical flower

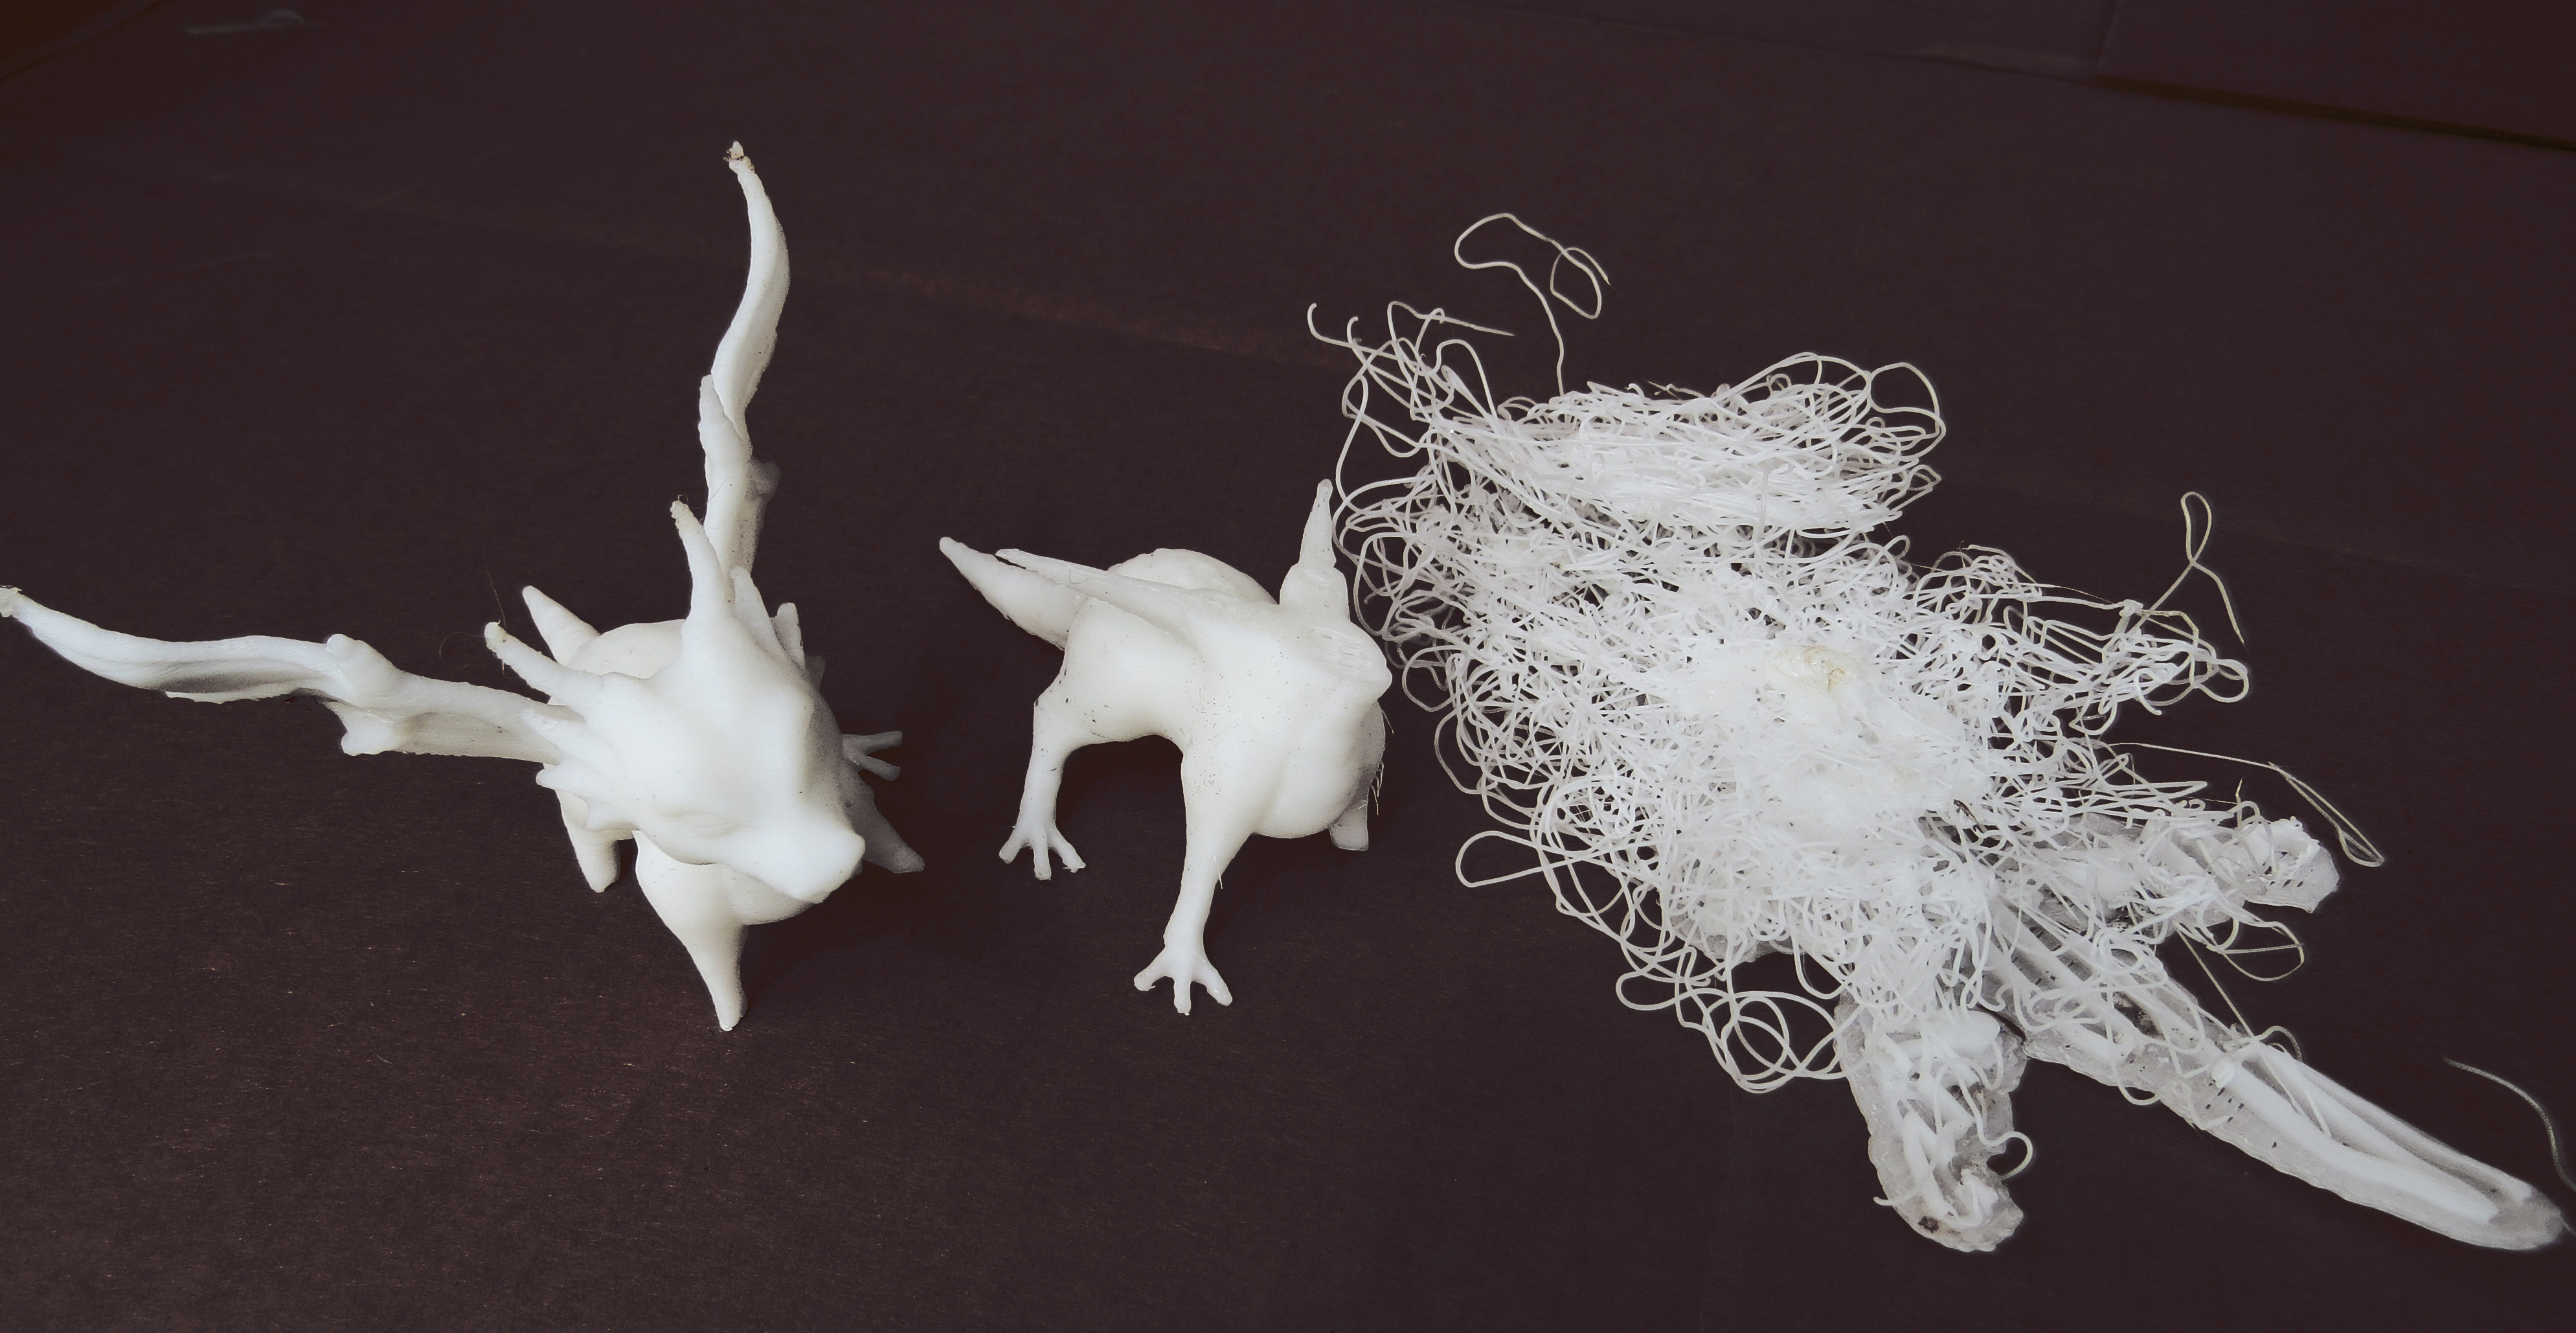
Frog and toad
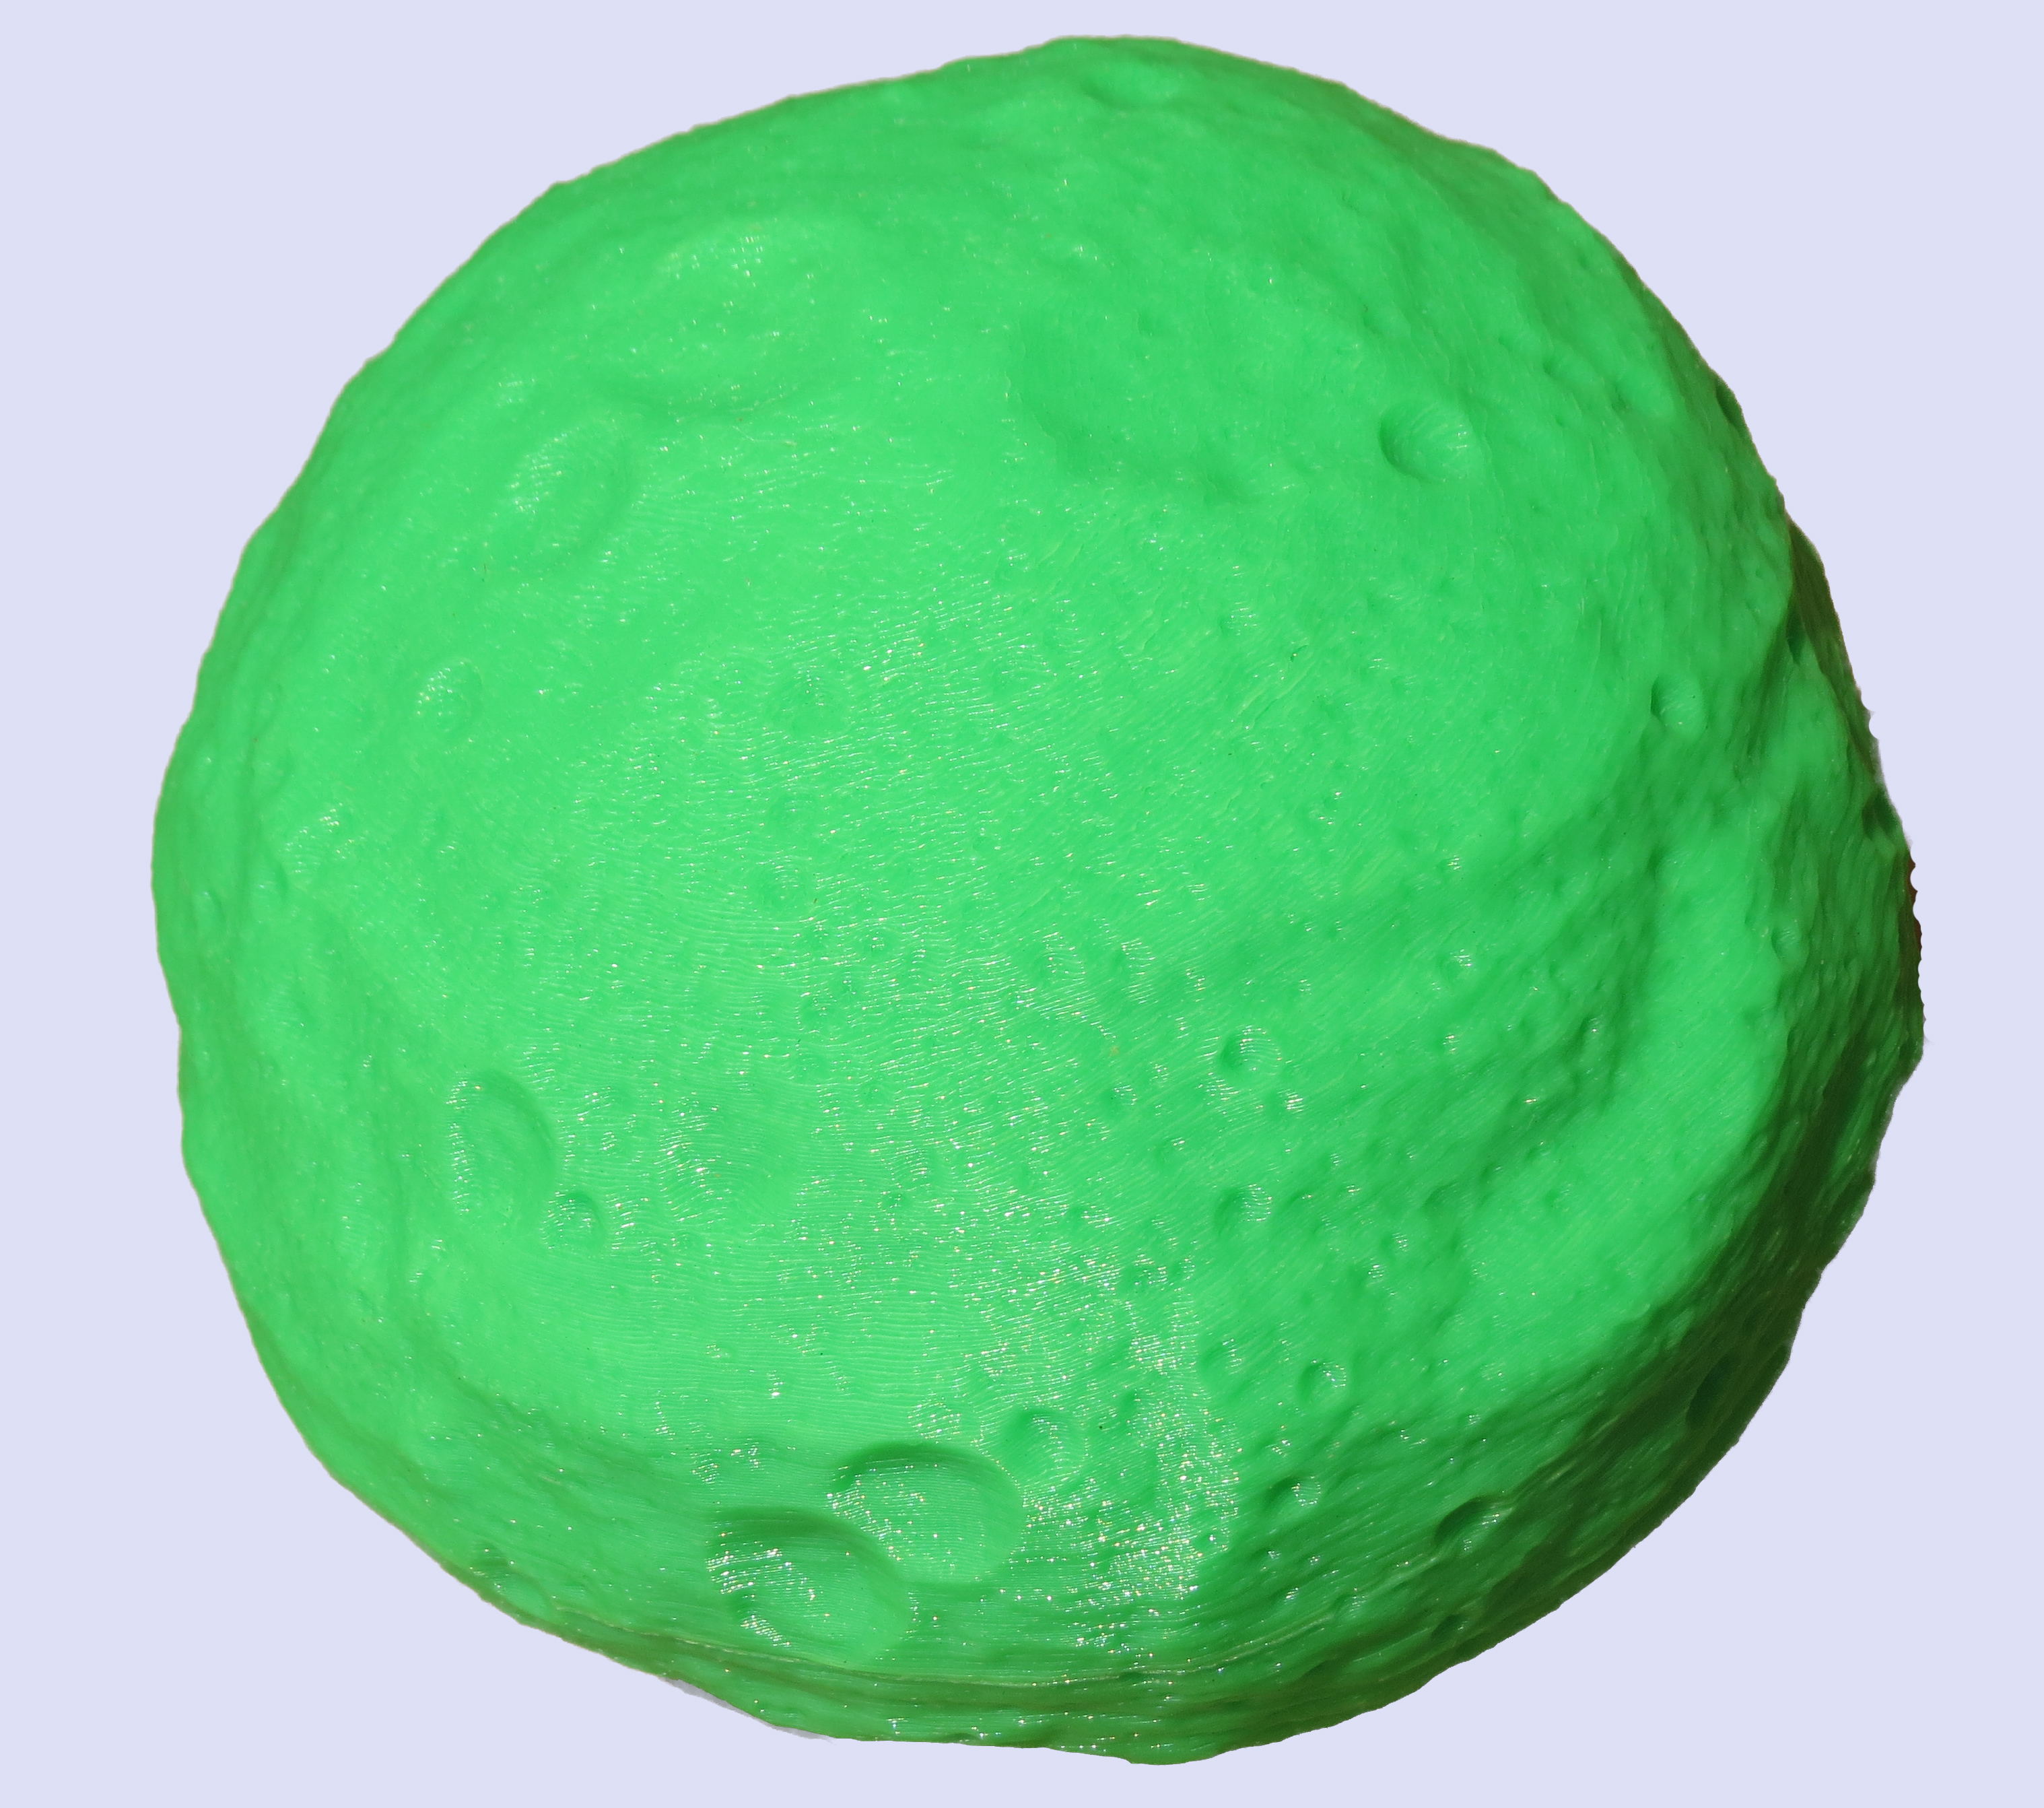
Printed from a model of the asteroid Vesta by NASA
Update 2/15/2015: Eight months later I added a third post on my printer. 3D Printer In the Home, Useful or Just a Toy? You’ve gone this far, you might as well look at what the future holds.
© 2014 – 2019, Byron Seastrunk. All rights reserved.


So glad you are providing valuable hobbiest input. Saves me from diving into the 3D market. I still think it will find it’s way next to the 8-track player pile….but I have been wrong many times in the past.