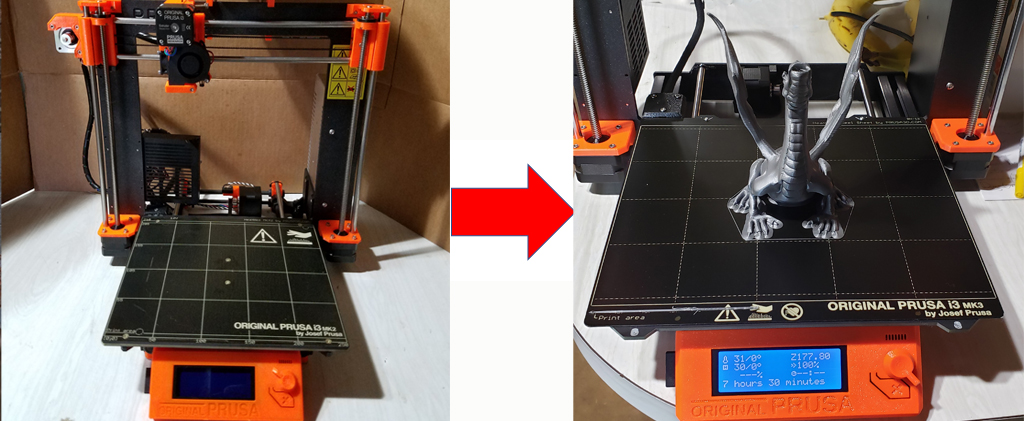
It’s Saturday night as I listen to my new Prusa MK3S and wonder how I can justify my purchase of a third 3D printer to my wife. After two years, my Prusa MK2 was getting a bit long in the tooth. My prints were no longer a thing of beauty. Where I used to have smooth lines, I now had rough edges. It was time to replace the bearings and belts.
I had selected the MK2 because it was easy to tear down but rebuilding it wasn’t a task I was looking forward to. Of course, I ran across the MK3S when I started looking at replacement bearings and belts. Upgrading to a Prusa MK3S from the MK2 was possible but Prusa had made so many changes that it was almost cheaper to buy a new printer. That single thought was my downfall.
The MK3S is built along the same lines as the MK2 but has a number of improvements. The power supply has been increased to 24 volts. This provides faster heating on the bed and extruder as well as more power to the stepper motors. The PINDA now has thermal compensation, no more manual adjusting of the Z axis to compensate for a hot printer. The print bed is spring steel coated with powdered metal for better adhesion. The software senses when your filament runs out and stops to let you add more filament. Even the frame was sturdier. Yes, I had a bad case of technolust.
Shipping was still outrageous and I used that as justification not to upgrade to a MK3S. That’s when Prusa called my bluff and offered free shipping for a limited period. That limited time thing is a very strong ploy in both writing and marketing. In my case, it crumbled all my excuses.
Did the MK3 prove to be the printer of my dreams? Not quite but it has proved amazing. Because I was already familiar with my MK2 building the MK3 was easy. I only had one spot where I had to tear down and backtrack.
Enough meandering, you’re probably not here because you’re wondering if I made it out of the doghouse yet. You want to know what I liked and did I find it a worthwhile purchase.
Since I bought the kit we’ll start with assembly. Here the MK3S was almost identical in complexity to my MK2. It was different sure but not a lot easier.
Checkout was much easier. I had no issue with frame skew. That could have been luck but I believe the new design deserves most of the credit. Adjusting the PINDA took less than 10 seconds. No additional tools, just a tie wrap. Setting my Z axis took all of 20 seconds and I was ready to print. I really liked being able to use the diagnostics to verify by belts were adjusted properly.
I never could get the filament autoloader to operate the way I thought it should. On the other hand, after turning the autoload function, loading filament was a snap compared to my MK2.
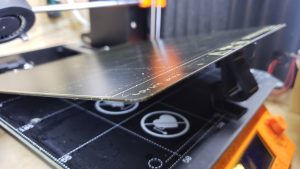
I can’t tell you how wonderful an innovation the removable spring steel plate is. In my rush to order, I ordered the double sided PEI print surface. Ever susceptible to marketing hype, I quickly realized my mistake and ordered the powdered metal plate separately. While waiting for it to come in, I discovered that printing PLA or PETG on my PEI bed was simply a matter of cleaning the bed between prints. I would lift the plate off the magnet holder, take it into the kitchen and use water and dishwashing soap to clean it. One minute at most and that included drying.
I still had to use glue for ABS but switching between glue and no glue was another 30 seconds in the kitchen. The big disappointment was the powder metal plate. Nothing would stick to it, glue or no glue. This turned out to be operator error. The two plates are a different thickness and Prusa expected you to do a full calibration every time you switched plates. Although I haven’t tried it yet, the latest firmware allows you to store calibration coefficients for different plates.
One of the improvements was the ability to detect a problem and restarting at that point. Prusa does this by measuring the current to the stepper motor, if it’s too high, they flag an error, home the extruder and go back to that point. This is another of those features that, to me, was more of a bother than an improvement. I was getting frequent resets in my Y axis. Putting the printer in stealth mode caused my resets to go away. The threshold is tunable but I ended up turning the feature off and that may have led to a later disaster.
This seems like a good lead into stealth mode. Stealth mode slows down your printer to reduce your overall printed noise. I never used it on my MK2 because, duh, it slows down your printer. The Prusa slicer shows the estimated print time for both standard mode and stealth mode. There is a difference but it was nowhere near what I expected. On an eight hour print, stealth mode requires an extra six minutes.
How about improved accuracy, better looking prints and all that? To be honest, I don’t see a lot of difference between my MK3S and what my MK2 was producing when the bearings were new and the belts were tight.
So, was it worth the upgrade?
Going to the spreadsheet:
- New bearings, rods, belts ~ $200
- The flexible metal plate is easily worth ~ $100
- Easier filament loading ~ $50
- Power failure recovery ~ $75 (I was already in the process of adding a UPS for just this reason)
- More comprehensive software ~ $100 (belt tension, fault log…)
Total estimated benefit $525
Okay, on paper the benefit to me is about $225 less than what I paid. Your mileage may vary. If I could sell my current MK2 for about $300, I would consider the trade up a bargain. On the other hand, I now have a great MK3S and a good MK2 as a backup. Why would I need a backup? I need to tell you about my disaster.
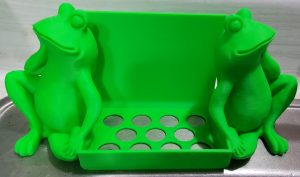
Setting the background, I was printing a beautiful frog soap dish in ABS, when the power went out. Rural Texas, in the middle of summer, this was hardly a surprise and only lasted a few minutes. True to their marketing promises, the printer gracefully returned to printing with no trace of a seam. I was impressed. Four hours later there was another power outage and despite all promises this caused a layer offset of about 1/10 inch. Greatly disappointed, I threw the print away.
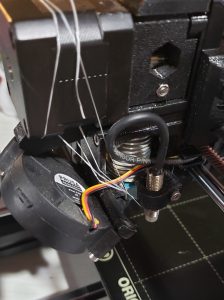
Cleaning the plate, I applied a fresh layer of glue (remember, I was printing with ABS). Although I was sitting at my desk at the time, I don’t know exactly what happened. I only know I heard a loud crunch. I stopped my printer and surveyed the damage. At a guess, one end of the ABS print had broken free of the glue and risen above the PINDA. The glue held firmly to the rest of the print and when the PINDA hit the print, the arm supporting the PINDA cracked, causing my PINDA to tilt about 30 degrees.
Using dental floss to hold the PINDA straight, I was able to print a replacement for my extruder backplate. Had the damage been worse, I would have needed my MK2 as a backup. Four hours later I was up and running again.
Final words on upgrading to the Prusa MK3S :
As much as I would like to justify my new printer to my wife, it’s obvious I can’t use the numbers to do so. Still, there is an intangible factor. I’m printing more because I enjoy it more. I also have far fewer failures. It’s not one hundred percent on sticking the first layer but it comes close.
Would I do it again if I could? Of course. Upgrading to the Prusa MK3S may not be justifiable on paper but I’m really enjoying it.
© 2019, Byron Seastrunk. All rights reserved.




I so envy you your brain!