You’ve read my post on Poser Debut or maybe you’ve enjoyed a few of the pictures I’ve created and wondered just how hard can this be. I’m not going to make this a tutorial but I will take you through a few of the scenes to let you see just what is involved in making these scenes. Along the way I’m going to give you a few hints that would have made this far easier for me. This not a tutorial, this is a description with a few hints from a beginner to people just starting out.
At a basic level, using Poser is like creating a scene using wooden puppets. I start out with a basic figure, add hair, clothing, a few basic props and position them to make the scene. The more joints in the puppet, the more lifelike you can make the poses. Poser works the same way, although with virtual puppets you can make them look like anything you want. Here my puppets are made of wood, dead leaves and water.
Just like you can with puppets, you can make your own figures and props but that takes a little more skill.
Still sound interesting? There are a number of ways to get started without spending a lot of money. Poser Debut lists for $50 and can often be gotten for much less. If you’re willing to wait, you can often find it free at Fry’s after a mail in rebate. Daz3D offers a similar program for free. Many of the 3d models are interchangeable between the two programs.
Daz offers their program free to encourage you to buy premade models from their site. Poser costs more but starts you out with more models. Both programs have strong capabilities. The best advice I can give is don’t try to learn both simultaneously like I did. Pick one or the other and stay with it long enough to feel comfortable. I decided to continue with Poser because I was more comfortable with the controls.
There are a number of people out there making some very good 3d models for these programs. Some of these are free and some of these are very expensive. As I said earlier, you also have the option of making your own models but that’s an advanced topics.
Of course the first thing I did was Google free 3D files and start downloading. That was a rude awakening, I had no idea what they meant when they discussed obj files, pose files and texture files. When they added morphs, rigging and boning, I was totally lost. How does a rope have bones and why? Most of the files I obtained were zipped and I had no idea where all the files went. Nor did I verify that the files were compatible with Poser. I managed to obtain a lot of completely useless files before I started to catch on.
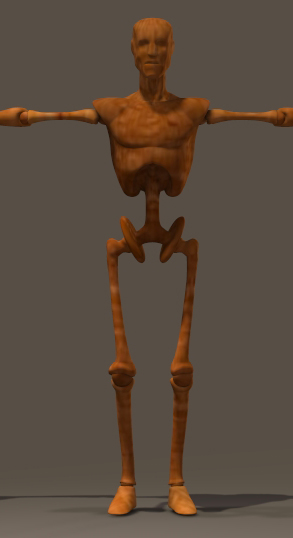
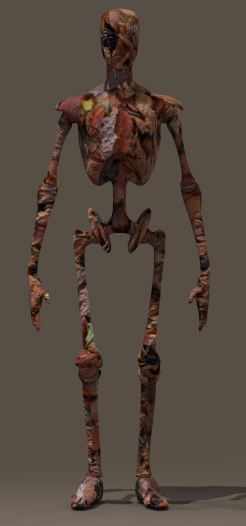
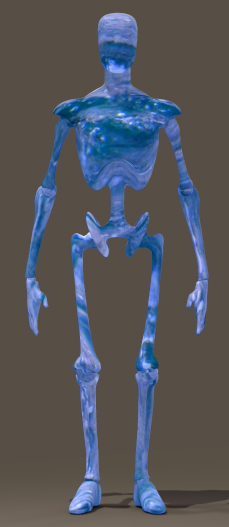
Simon – Naked male from Poser
I learned my lesson
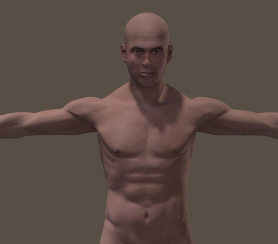
While we’re discussing models, I may as well bring up the topic of nudity. The majority of your human models start out nude and you have to get used to working with them that way. Both programs do their best to reduce overt nudity but you will have to get used to it. Explaining to your wife that it’s easier to arrange naked female figures is not the best way to end an evening.
I finally realized it was much easier to get my models from a few professional suppliers. They look better, are usually complete and don’t cause as many problems. You still have to read very carefully what you are acquiring. Standard practice is to sell a base figure as a package and then sell other packages based on the same figure but using different textures or morphs.
Once again I managed to acquire a lot of files I couldn’t use. I had poses without the base fixture, I had textures with nothing to apply them to and I had hair that refused to fit on any model I had. I might be able to use them someday, I only need to buy a few more files. When you buy a 3d model, make sure you know if it has prerequisites.
The easiest way to show the file differences is visually. This is the object file for a bird as it looks in Poser. The little dials on the right allow me to move the wings, head, body and even the beak.
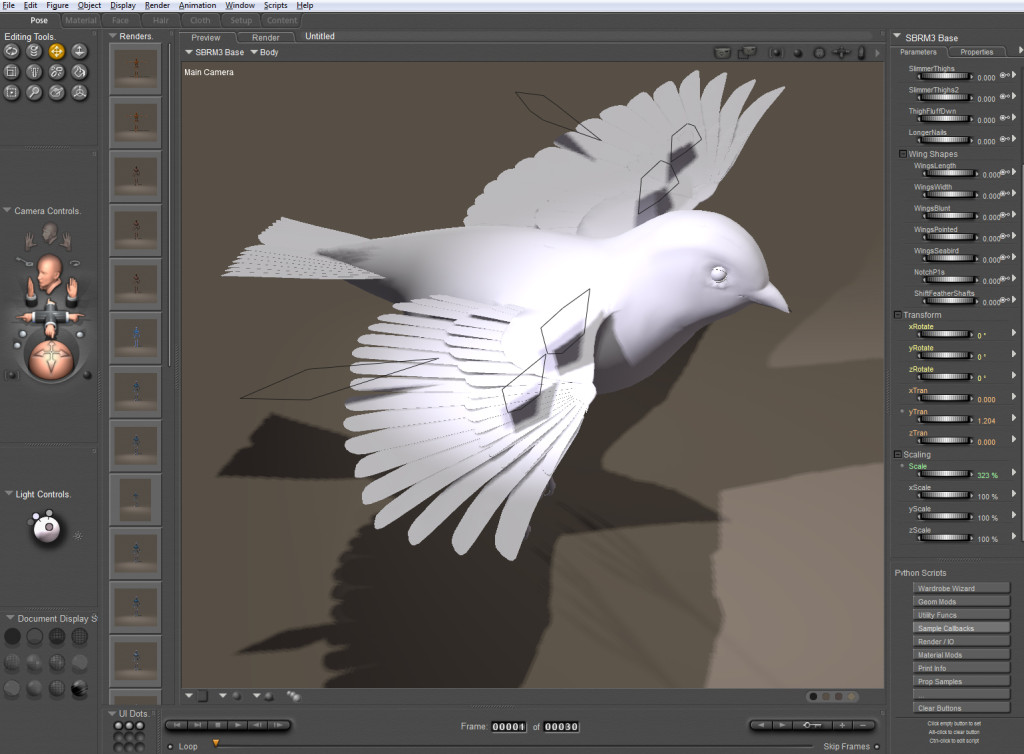
A pose file sets the dials to preset levels to achieve a desired position. This can be done manually but it’s usually easier to use pose close to the final and make fine adjustments from there.

Now the bird is looking at us but it still looks like a plaster of Paris sculpture. Time to add texture.
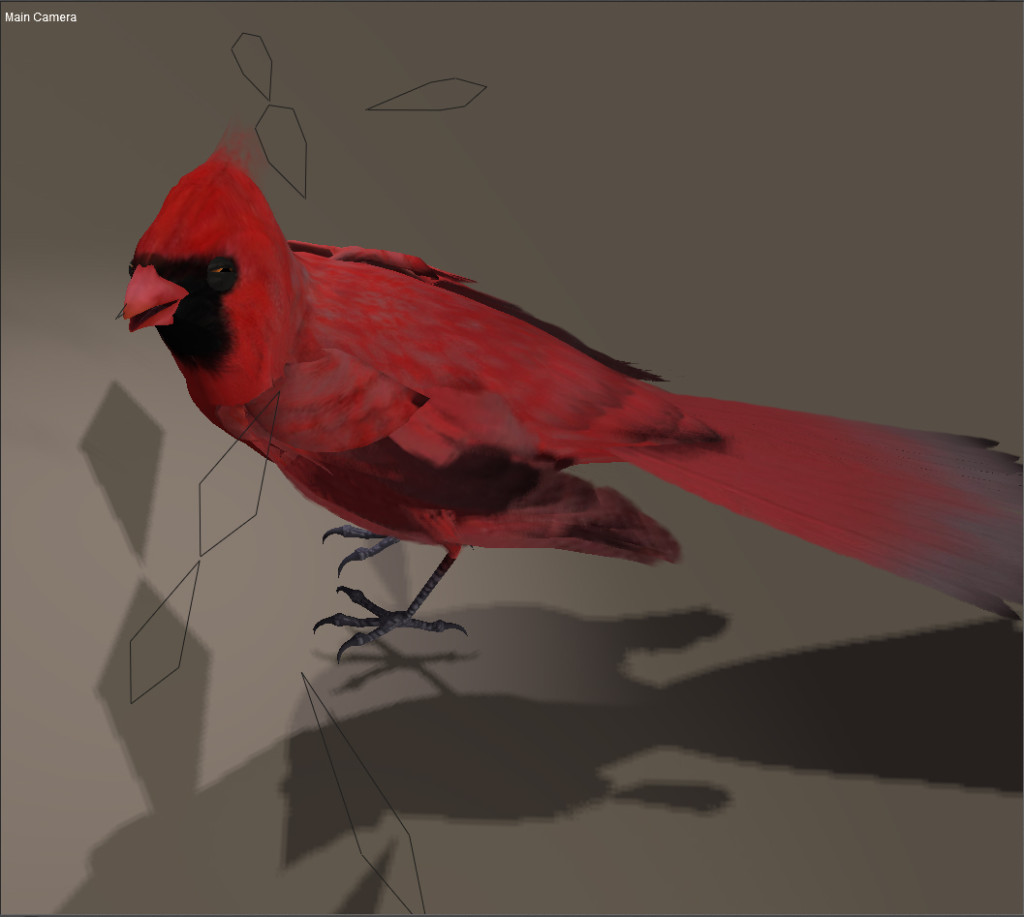
Texture adds color and shape to the bird. It’s starting to look like a real bird. If for some reason you don’t like cardinals, changing the texture gives us a totally different bird.
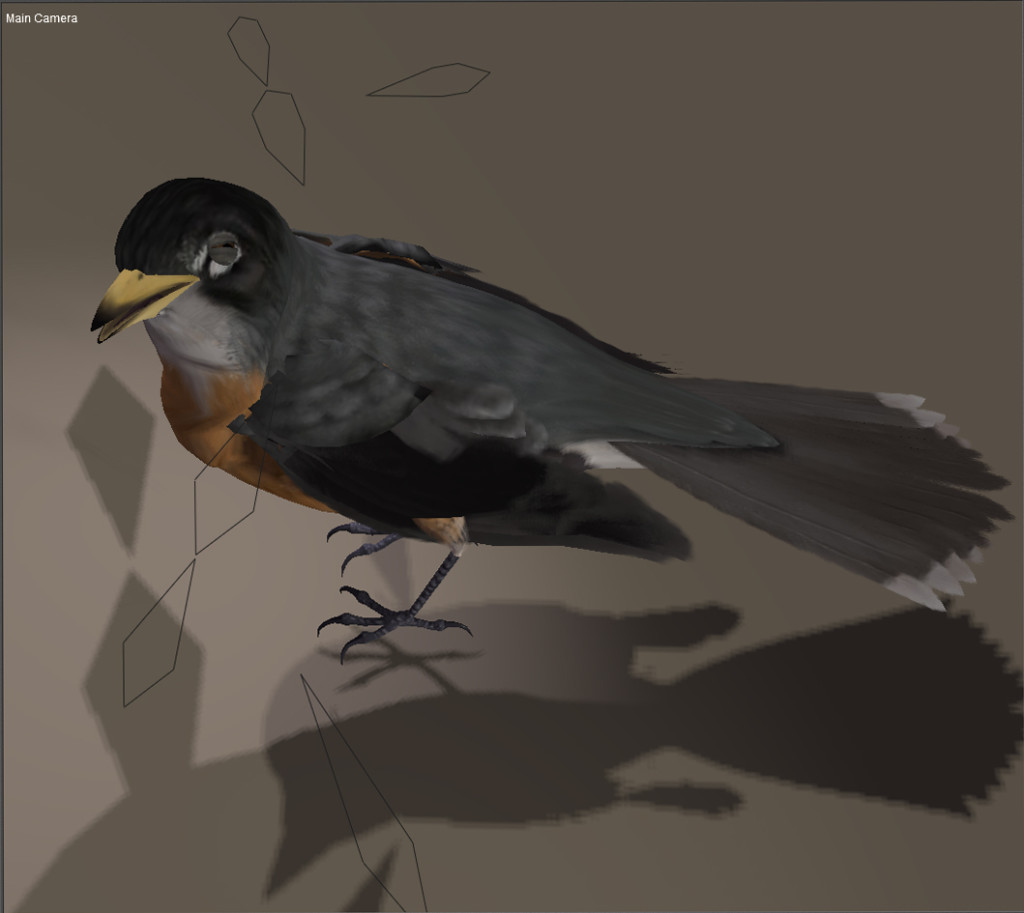
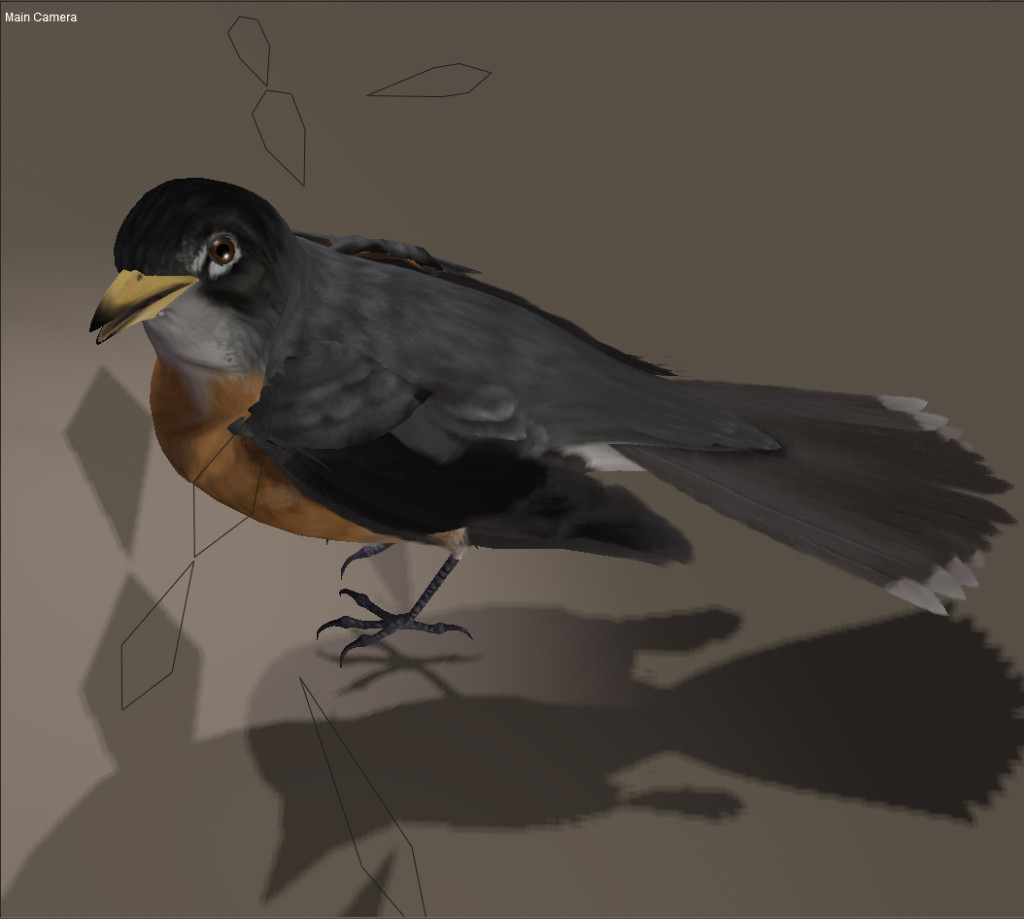
I don’t like the way the pose has the eyes closed and I’ve yet to see a robin that skinny. Here’s where I use the dials to morph (change) those features. Having premade morphs often distinguish professional 3d models from the free ones. In this case the artist supplied the morphs I wanted. A few seconds later and my robin is wide-eyed and fat.
He’s a nice looking bird but he needs a few props to give perspective. Add a bird bath and some grass and we have a real scene.
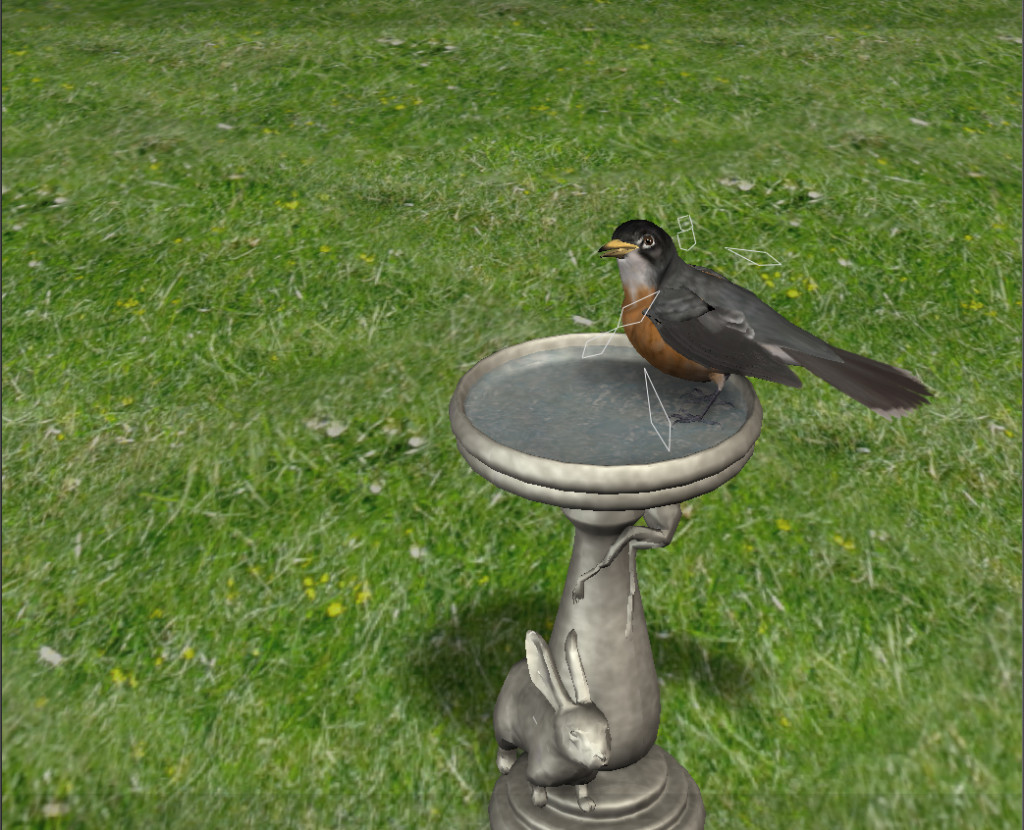
I could stop here but this scene looks too sterile. Now all I have to do is copy this bird a few times and apply a few different poses and textures. One last step, once I have a scene that I like, I have to render it. This is where Poser or Daz calculates how the objects look in the light and reflections from each object. A good rendering can take several hours but makes a huge difference in appearance.
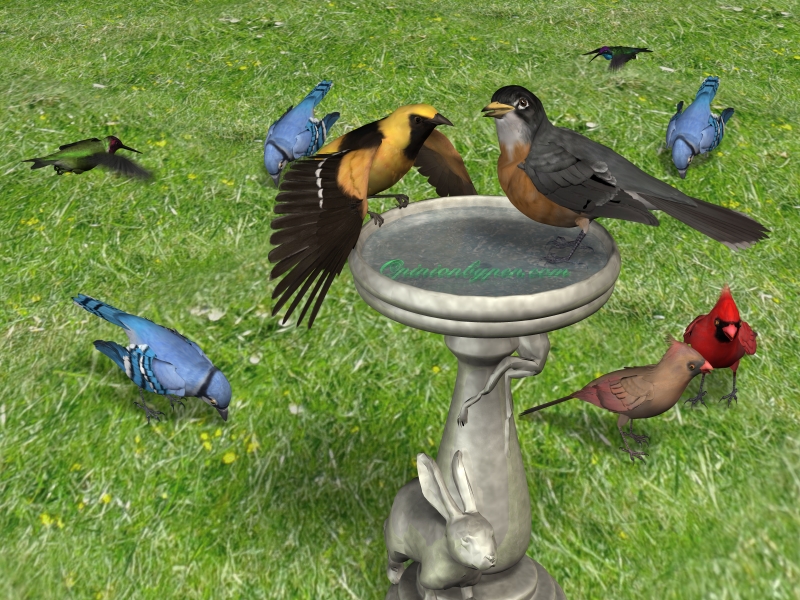
The picture above would have taken me less than an hour to make if I weren’t creating it as I wrote.
If you’re interested in pursuing this further, here are some of the vendors I deal with:
Contentparadise.com – This is Smith Micro’s (Poser developer) storefront. They have a number of free and paid 3d models. They also have a number of free tutorials on using Poser.
www.Daz3d.com – Free DAZ3D Studio and some very nice 3d models. The birds above and the birdbath both came from Daz3d. They often have free models and specials. Not surprisingly, they have a number of free tutorials on Daz Studio. They also support Bryce, another very interesting art package.
www.Poserworld.com – Poserworld operates on the subscription model. You subscribe to them for a month, a lifetime or anything in-between. As a subscriber you can download all the 3d models you want. They release new models frequently. They will consider special requests and provide a number of useful tutorials.
www.Renderosity.com – I like Renderosity. They have a wide variety of packages and free packages. They run a lot of specials. When I need an unusual scene or special effects, I start with Renderosity.
www.ShareCG.com – ShareCG is a good place for aspiring artists to show off their efforts. Everything is free but you have cognizant of the rights given to you by the packages. Some are for personal use only and some are free to use for both commercial and personal. I’ve found some very good 3d models and some very mediocre. The grass in my picture came from HoboBo on ShareCG. On April 25, 2013 they announced a Poser sweepstakes and they are offering a free 30 day version of Poser to get familiar with Poser in preparation for a contest.
PzDB – PzDB is not a site, it’s a program that makes it easy to keep track of all the models you acquire. When I passed 100 files I was lost and found it increasingly difficult to find my 3d models. Now I only do a search followed by a drag and drop. I highly recommend it.
You might also enjoy seeing some of the other pictures I’ve developed over time. You can a rapid improvement as I started using Poser more and more. Poser Gallery
© 2013 – 2019, Byron Seastrunk. All rights reserved.


Well !!!! Now you are the number one go to on Google… for this article, at least..
Did you know?? This blog shows up best in Firefox.