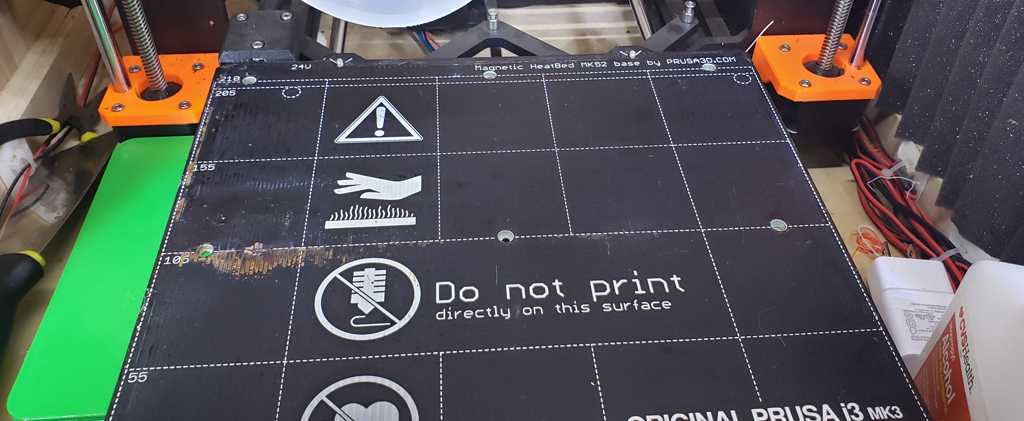
I’m writing to warn all the Prusa MK3S owners about a built in self destruct mechanism in your printer. Avoiding it is easy, not avoiding it cost me over $100 and took my printer down for over a week. It all started when I started seeing bare copper traces on my heat bed.
For those of you reading this without a printer, the Prusa MK3S has a magnetic heated bed that is covered by a removable build plate of spring steel. The 3D models are printed on top of the build plate. In my case, both sides of the build plate have a thin film of PEI covering them. Good so far?
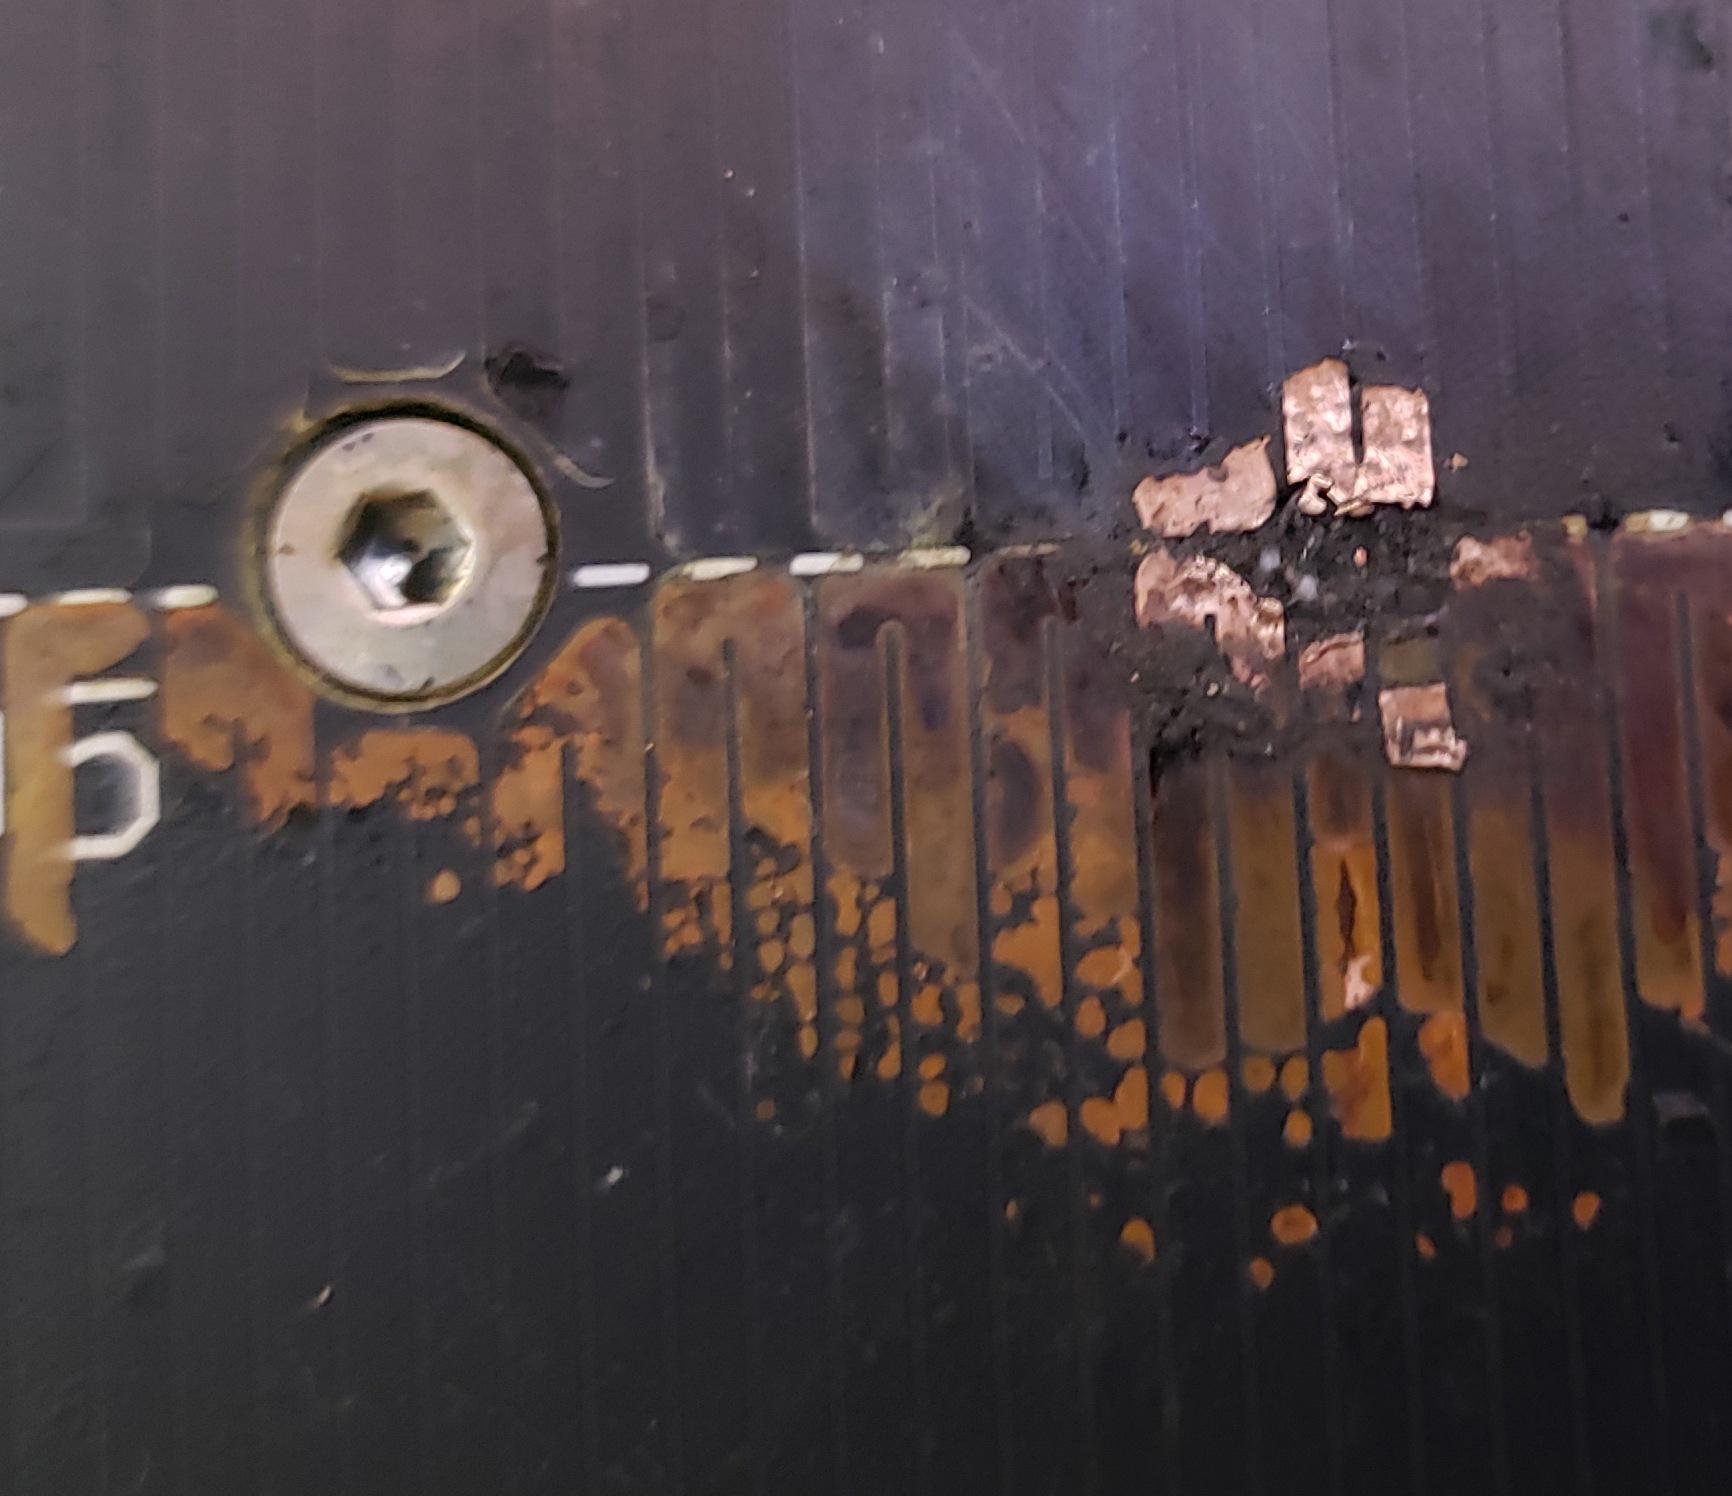
Bare copper on heater bed. After the traces were damaged.
I don’t know what caused the paint to start peeling from the bed. The spot started slightly to the left of the build plate center. My first reaction was to panic and repaint or use polyimide tape to cover it. Those first reactions are important. Too bad I ignored mine.
Looking at the traces, I could see they were in a straight line much like the defroster on your car’s back window. That analogy was my undoing. Your defroster uses a number of identical heater elements running from one side to the other. If one breaks that line quits heating but the heater still works, just not as well. The key here is that all the lines have essentially the same potential. A short from one line to another (in essentially the same position) will have no effect.
With that in mind my panic subsided and I also realized that the only thing coming in contact with those bare copper was the build plate and it was insulated on both sides. If my analogy had been correct my printer would still be printing. I was so wrong.

Heater trace path. Serpentine routing, not straight across as I first assumed.
I don’t know the exact pattern that Prusa uses for the heating element. Unlike the window defroster they have to keep the entire bed at approximately the same temperature. Looking closely at my exposed traces you see that the pattern breaks in the center. Rather than straight across, the heater traces follow a serpentine route that divides the board in half. This division creates a high voltage between two very close traces.
As an additional factor, the PEI insulation on the removable build plate should prevent shorts. Here’s where my own laziness caused the disaster. The removable plate is very easy to clean. A little water, a little dish soap, a little scrubbing and your plate is like new. I was printing ASA so I was cleaning frequently to remove the glue buildup. I was careful to dry the printing side because I had to apply more glue but I wasn’t as careful with the back side.
Now I have a damp plate in contact with two high potential traces. You may not recognize it but this is the same setup used for electroplating, so I’m moving copper from one trace to the other. As the donor trace thinned, the trace became a hotspot and burned through the PEI insulation on the spring steel. Once that happened my heated bed and plate were toast, literally.

Printed plant labels. Useful in convincing wife printer is not demon spawn.
My wife is reading this so I’ll point out that while this sounds bad, my printer was not at risk of bursting into flames and burning down the house. I have burn damage to the PEI on my build plate. I also have damage to my heater bed but once I had a short circuit across the heater circuit, the power supply shutdown ensuring the damage was limited. This was how I discovered the problem, each time power was applied to my heater, the printer would reset.
Let’s recap. Bare copper traces in the middle of the heat bed, frequent cleaning of the build plate and less than careful drying before use. Net result was a slow self destruct mechanism with the heater traces getting thinner and thinner as a result of the electroplating effect promoted by the water and 24V heater power. This caused a hot spot that burned through the PEI coating on my build plate ultimately causing a short circuit.
I don’t know what caused the bare traces on the heat bed. There are a number of other bare copper spots on the outer edges that I can attribute to wear. None of these are worn enough to show multiple traces. Still, if you followed my window heater analogy, it’s obvious that my failure would not have occurred if the bare traces were anywhere but in the center of the card. This is the only place the heater pattern has sufficient voltage potential between two adjacent traces to cause the electroplating effect.
I can’t accuse Prusa of a bad design because my own lack of care in drying the build plate was also a contributing factor. Once Prusa assured me my new heated bed was on its way, I was able to consider the chain of events. I had just finished Humble Pi, When Math Goes Wrong in The Real World by Matt Parker ( this should be required reading for all engineers) and this incident made an excellent example of the Swiss Cheese Theory of Failure, sometimes all the holes line up. At least that’s what I hope but just in case, you’ve been warned.
© 2020, Byron Seastrunk. All rights reserved.


Recent Comments