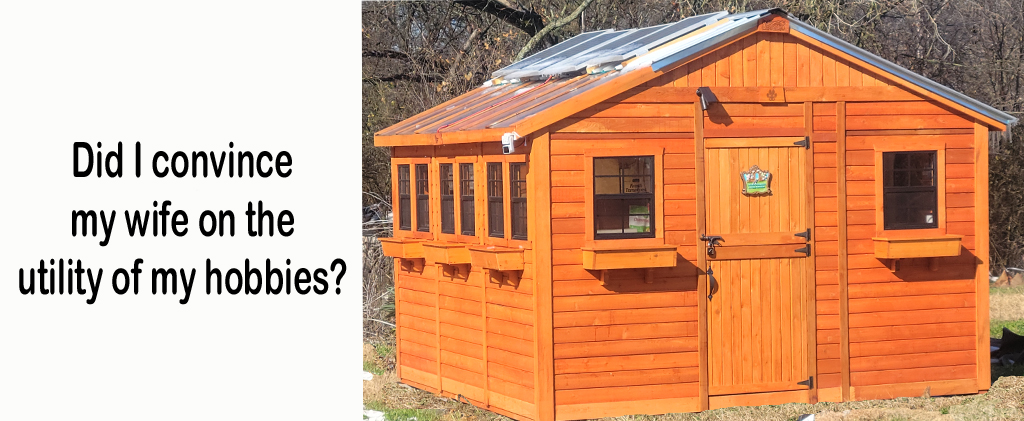
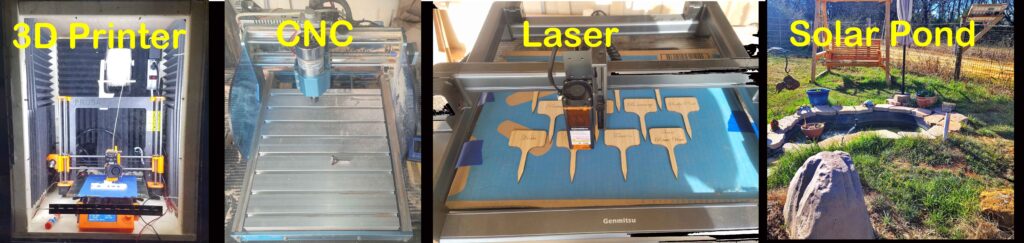
Readers of my blog have been subjected to reviews on three different 3D printers, a CNC wood carver, a laser etcher and a host of solar projects. By now most of you have asked yourselves why is he doing all of this? The same is true of my wife. She eyes each new addition with suspicion. What do I intend to do with it? What does this do that the others do not? Why do I waste my time and money on these gadgets? Will it burn down the house?
Like most technology enthusiasts, one of our major obstacles is to convince our spouse that the time and money we invest in our hobby wouldn’t be better spent invested in something as rewarding as ostrich farming. With each addition to my workshop, my wife wonders why I thought I needed another high tech toy.

Archibald liked it
So far, I’ve managed to justify my 3D printer with plant labels, a variety of hooks and several emergency plumbing pieces. My CNC was a little harder to justify but it does make terrific plaques and nameplates. Still, how many of those can I justify? Even with the high price of eggs, my wife wasn’t buying into my suggestion of individually carved nameplates for each of the chickens. Purchasing the laser engraver pushed my credibility into extreme negative space.
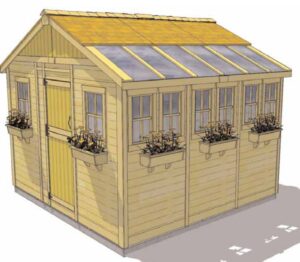
I needed a project. Something big that would allow me to use all my high tech tools and give my wife credible justification for all my indulgences. That’s when I came up with the idea of a storage shed. Her greenhouse is showing its age but still hanging on well. However, as her garden grows, she’s accumulated a lot of pots, planters and specialized gardening tools. And that was it, storage was her big need. Going high end would also allow me to introduce little niceties printed, engraved and carved that would demonstrate the usefulness of my technology.
The brochure
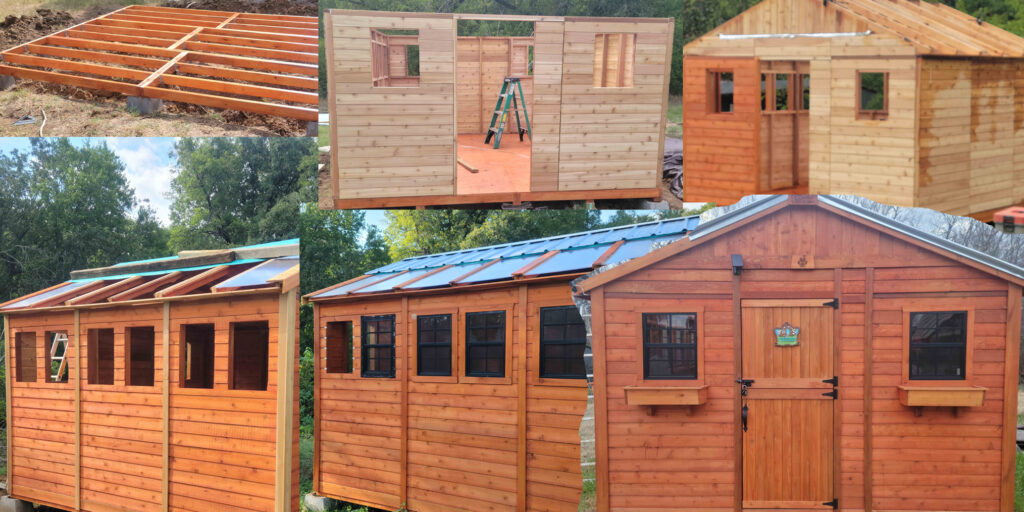
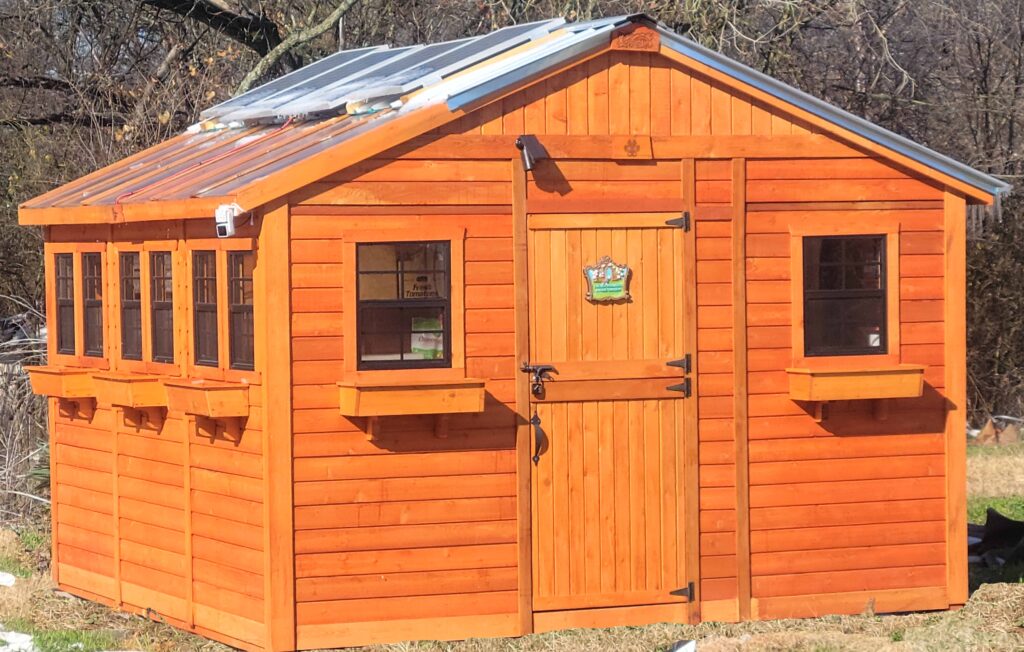
It was a great idea, but have you tried to buy lumber recently? I wanted to impress her, not take out a second mortgage. Still, after three months of research, I finally decided on a kit from Outdoor Living Today (OLT) for a 12 by 12 cedar workshop. You’re right, I was ignoring my former struggles with the greenhouse. Besides it’s still standing and I’m much better at construction now.
The kit definitely looked perfect for my wife. Six sun windows on the roof, more windows on the walls and little planters at each window. When I bought it they assured me that it could be assembled in about three days and not to unpack until I was ready. That three day of assembly time also assumed two additional helpers and good weather. Doing it myself, in Texas weather and adding a few mods on the fly, it took me closer to three months.
The good:
- With a little thought, ingenuity and slight deviations from the instructed sequence, it can be assembled by one person.
- The wall panels are very modular, allowing for a high degree of personal preference in the placement of the windows.
- Once finished, it’s structurally sound and looks fantastic.
The bad:
The Start
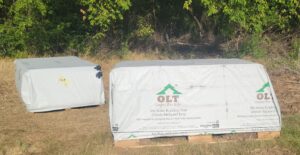
The kit comes in two large pallets. There was no map on which pierces were in which pallet and packing was certainly not in order of usage. I ended up having to unpack both pallets before starting. Because of the slower assembly time, unpacking the pallets allowed a few pieces to warp.
The instructions make a lot of suggestions to keep water out but the cedar used contained a lot of knots that had cracked during the drying process. I went through several tubes of wood putty sealing these holes.
Two of the rafter pieces were so cracked I had to buy replacements at the local hardware store. The retail price for two pieces of cedar convinced me the kit was a bargain. It wasn’t a total loss though; I was able to use the original rafter pieces for some of the modifications.
Sealing the overhead windows with caulk exceeded my construction capabilities. With the seams still leaking after my second caulking attempt, I used Gorilla Glue flashing tape. Faster than caulk and no leaks. I should have started there.
I used a sprayer to apply the stain. This was where I discovered the knothole issue and realized the overlapping slat construction allowed some of the stain to run down the already stained outside walls.
Modifications:
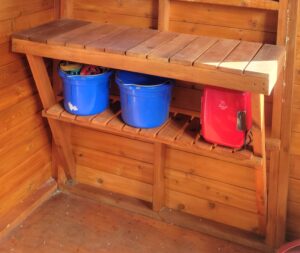
Extra Work Bench
The kit does not provide stain for the wood. Cedar weathers well without stain but stain can improve both the appearance and longevity of the wood. I planned for two gallons and went through a total of eight gallons.
The original plans called for an L shaped work bench. My wife wanted to separate it into two work benches. I was able to cut the scrapped rafter pieces into the additional pieces needed for the mod and add a lower shelf.
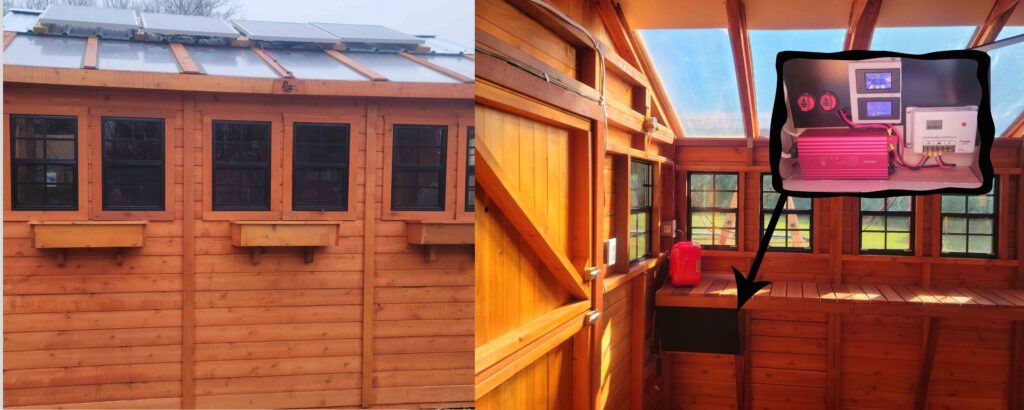
Solar Power:
Normally my initial planning for a solar system involves several hours with a spreadsheet, calculating wattage requirements, operation hours, and system growth. Results from the chicken coop fan and the pond filter projects taught me that most solar panel manufacturers seem to obtain their rating using high noon in the Sahara desert. Although it may seem that way at times, Texas sun isn’t quite that bright. You almost never get 100 watts from a 100 watts solar panel.
As an additional complication, under full sunlight, a 12 Volt panel is actually putting out somewhere around 18 Volts or higher. The solar controller is trying to turn that into 12 volts usable by a battery. This conversion means more losses and depending on your controller, it can be quite high, look up MPPT versus PWM. On a bright Texas day, I’m happy if I get 70 watts out of a 100 watt panel.
To this you have to add hours of sunlight, hours of operation, total wattage use and battery capacity. Assuming six hours of full sun, your system needs to charge the battery in that time as well as provide the constant power demand requirements. The Ah rating of the battery has to be high enough to provide power for the 18 hours you don’t have full sun. And we haven’t even considered those rainy days with little or no sun.
Now while all of the above is true, from the moment I saw a picture of the finished building, the half roof was screaming at me for solar panels. There’s enough room to fit four 100 watt panels. The rest was simply maximizing the system. I ended up with a 30 amp controller, a 500 watt inverter and a 100 Ah LiFePo4 battery. About $800 in all after I include the wire and solar panel mounts.
My only critical decision was how to wire the panels. With four panels I could wire it for 12 or 24 volts. 24 Volt would allow me slightly lower gauge wire but they don’t make off the shelf 24 Volt batteries and the cost of a second battery drove me straight to a 12 volt solution. This is still a significant issue. If I ever decide add more panels I will have to convert to a 24 volt system.
It can’t drive a heater (1500 watts) or a small air conditioner (600 watts) but it provides enough power for daily use of a 52” ceiling fan and light (65 watts), and continuous power for a 5th generation Echo Dot and a security camera. This also provides enough power for a small television, grow lights, laptop and phone charging.
Yes, the engineer in me added a few switches and meters that my wife will never use but I enjoy having them. They did allow me to discover I get 45 watts of power on a cloudy day. The Texas power grid may fail but our phones will stay charged.
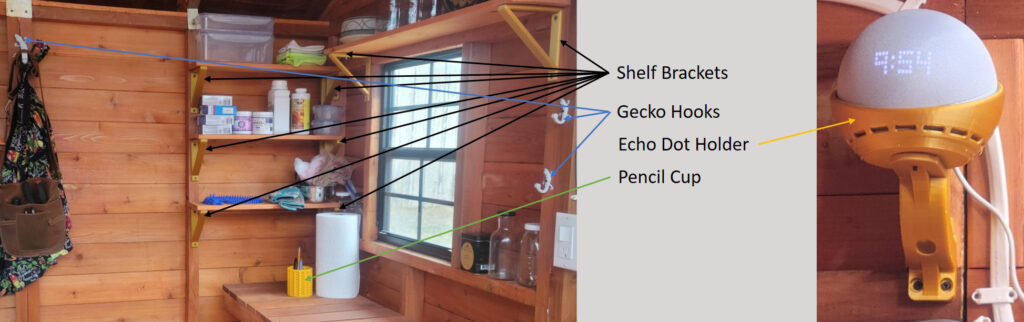
3D printing:
When it comes to 3D printing, plastic has a hard time competing with the appearance of cedar. Still, there’s no question that 3D printing is more versatile and faster to prototype. Adding shelves using 3D printed shelf brackets seemed like a perfect solution. Throw in a printed mount for the Echo Dot and a full invasion force of different sized Gecko hooks and there’s no question of the role 3D printing played here.
Laser engraving:
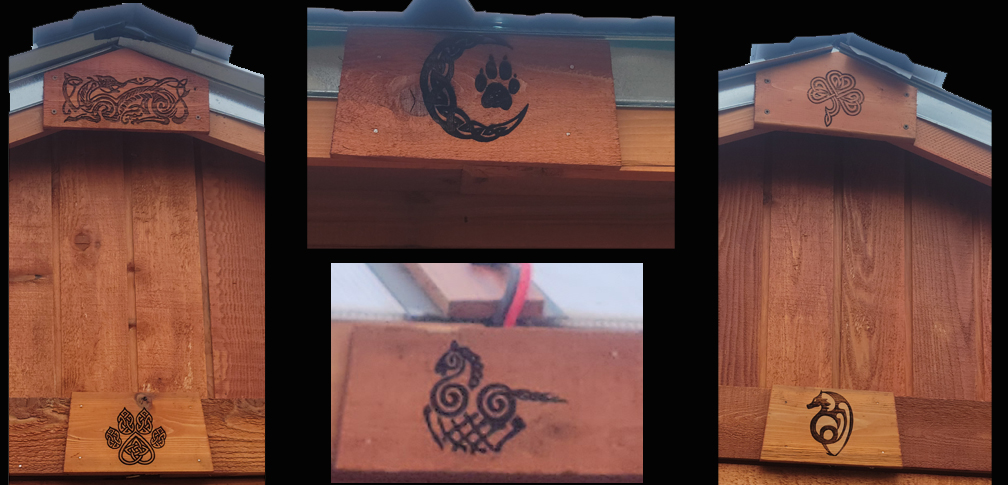
The building uses six short pieces of wood to hide joints. Their shape reminded me of plaques and I realized that these were perfect for laser artwork. After a little consultation with my wife, the building is now enhanced with six Celtic good luck symbols, all thanks to my laser engraver.
CNC:
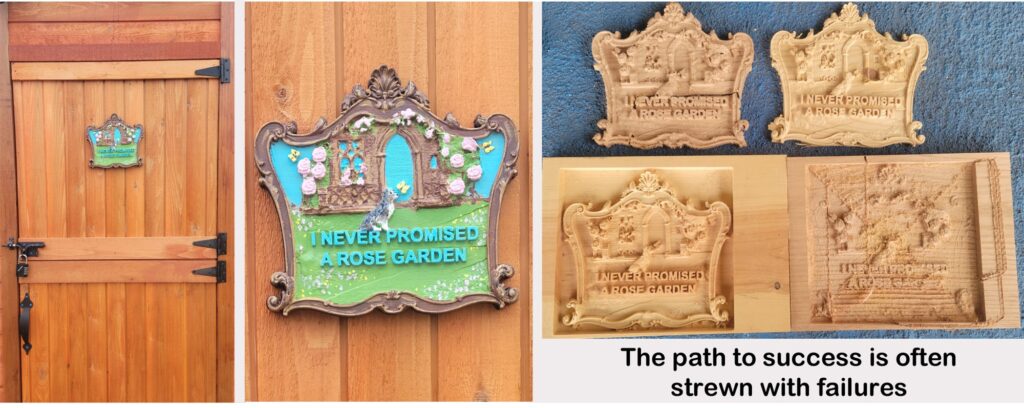
I already knew how I wanted to use the CNC but arriving at just what I wanted to say and getting it just right took several attempts. I finally had something I liked and my wife painted it for me. Don’t ask me why but I chose to use a 3D printed backing and magnets to mount the plaque. I’m worried my subconscious is planning for a series of plaques.
Wrapping it all up:
Did I convince my wife that my hobbies have real world applications? Doubtful, I think she still feels the money would be better spent on a tiller for the tractor and my time better spent learning how to improve our soil.
On the plus side, I improved my skills and capabilities with all my tools and gave my wife a very nice covered area to store her gardening implements and get away from me. I call that a win.
© 2023, Byron Seastrunk. All rights reserved.


Recent Comments